
In this guide we're going to take you through creating your first server (or 'Droplet' as they call them) and then show you how to integrate ServerAuth into that server to make managing your server a breeze.
To avoid uneccessary filler on this guide, I'm going to assume you have already registered DigitalOcean and ServerAuth accounts. If not, do that now before proceeding.
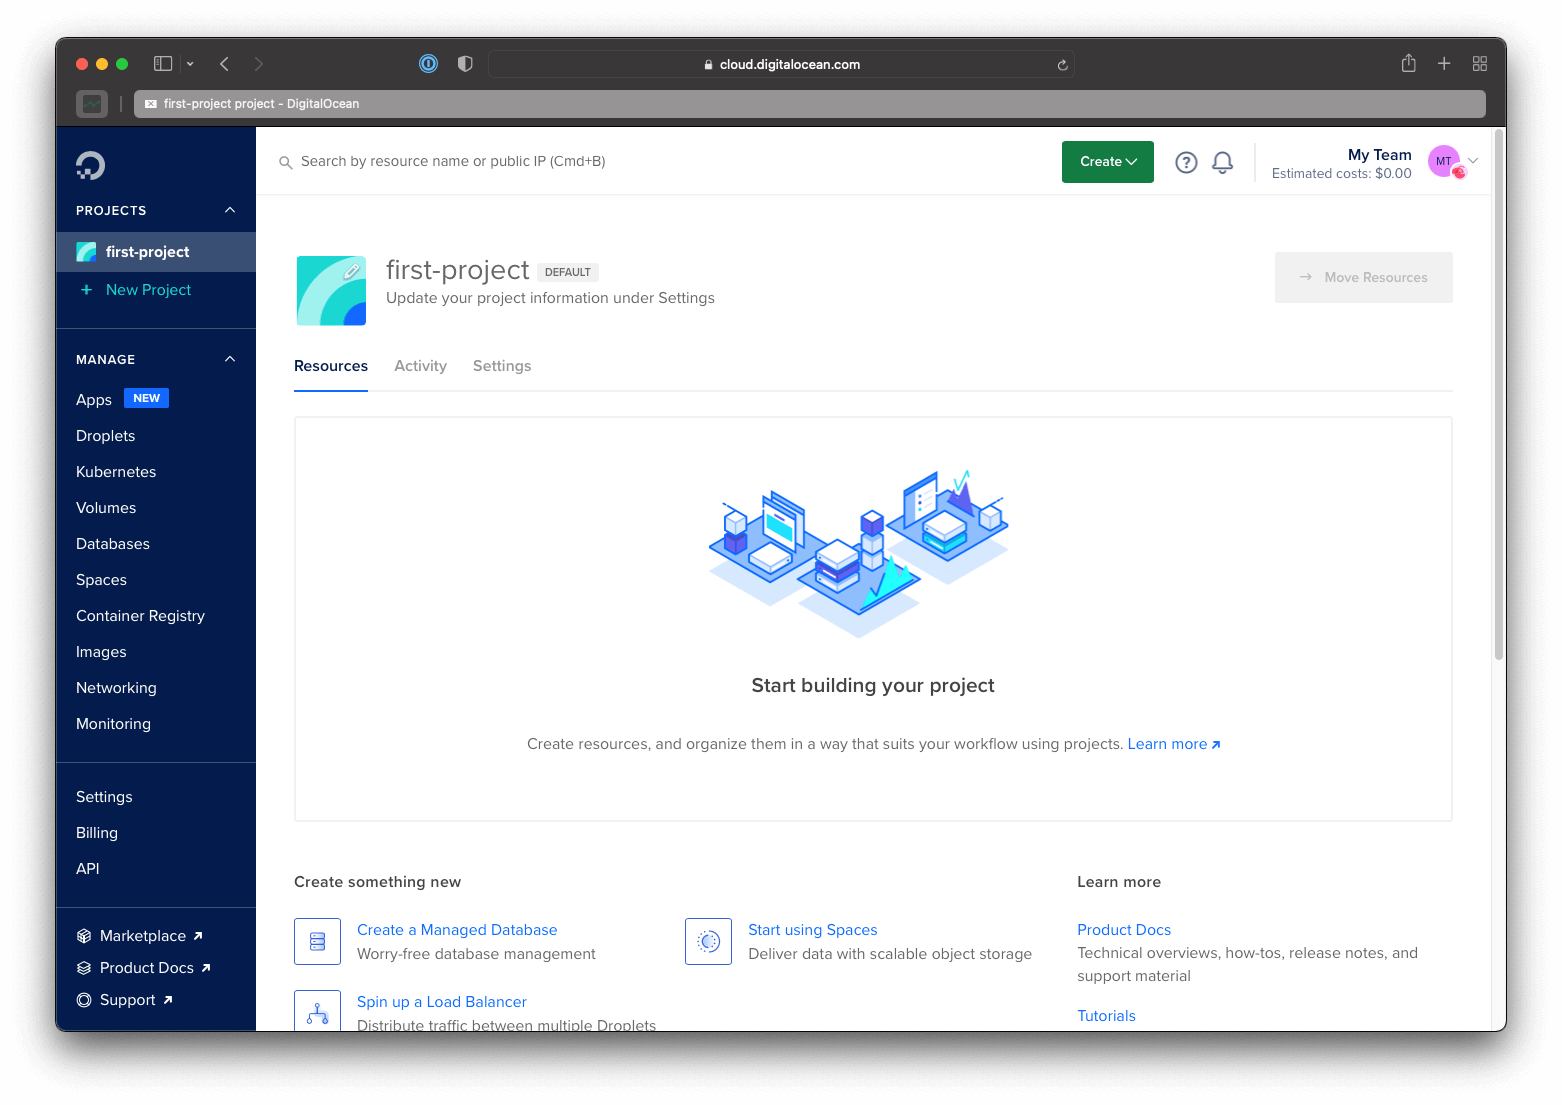
When you log in to the DigitalOcean control panel, you should be presented with a screen that looks like this.
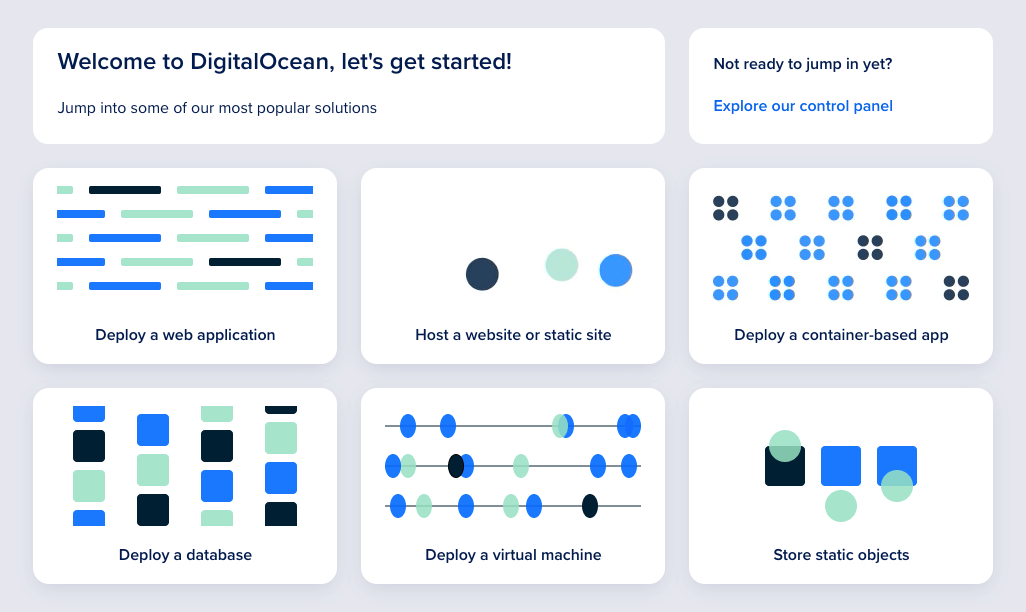
If you have only just signed up to DigitalOcean, the first screen after confirming card details may actually look like this, simply click the link to "Explore our control panel" and you'll be taken to the above page.
To help get you started, DigitalOcean create a project for you called "first-project". This is essentially a wrapper and allows you to group infrastructure together so you could have different servers in different projects without them interfering with each other.
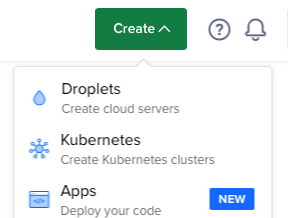
For this example, we'll continue to use the "first-project", however if you want to creat your own, you can do so using the "New Project" link in the left menu. When you're ready to create your first server, find the green "Create" button at the top of the page and click it to drop down some more options and select the first option for "Droplets".
This will take you to a new page where we can finally create our first server!
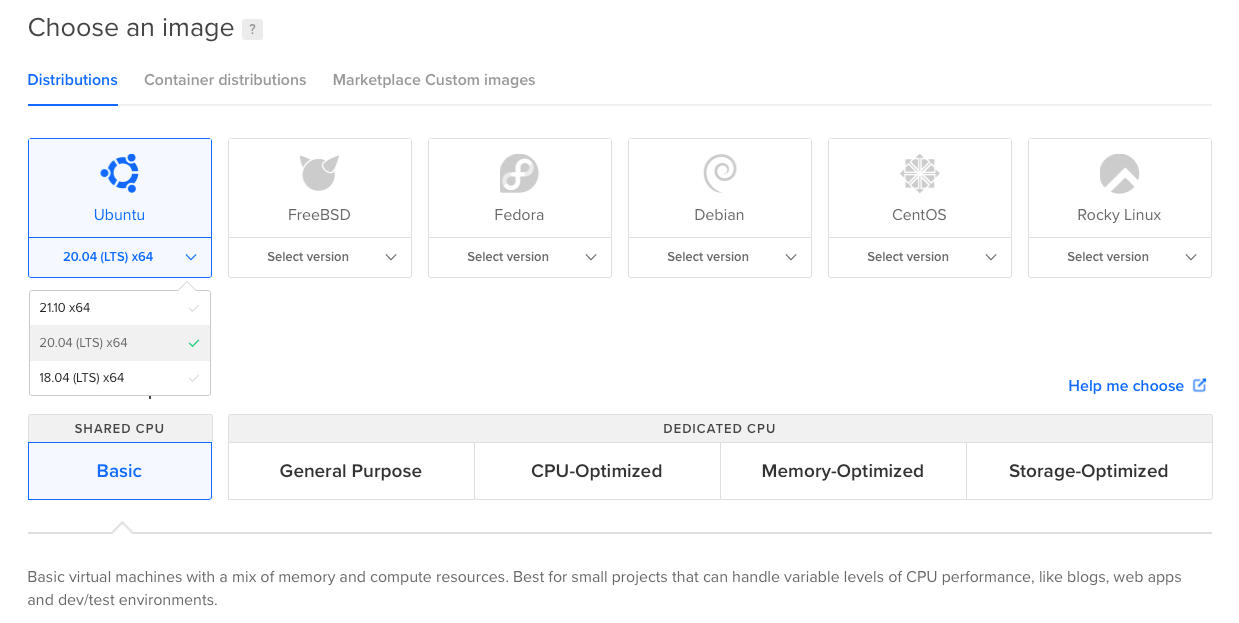
The first part of the form lets you select which operating system and version DigitalOcean will install on the server when it is being configured. For this guide, we're choosing Ubuntu 20.04 but you can choose whichever flavor of Linux you prefer, the only one we don't currently support is FreeBSD. We're also selecting the Basic, Shared CPU plan. Again, this is purely for the purpose of the guide, select whichever plan suits your needs best.
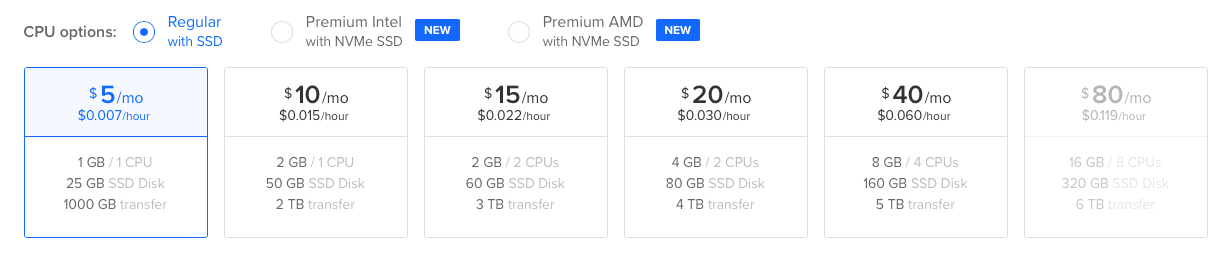
Next, building on from the Basic, Shared CPU plan. We're selecting regular CPU with SSD and going for the smallest size, $6/mo.
We don't need any block storage creating for this kinda so we are skipping that option but add any extra volumes you need.
Next you need to select the datacenter region. We're selecting New York 1, but as with all the other options, select the region that suits your needs best.

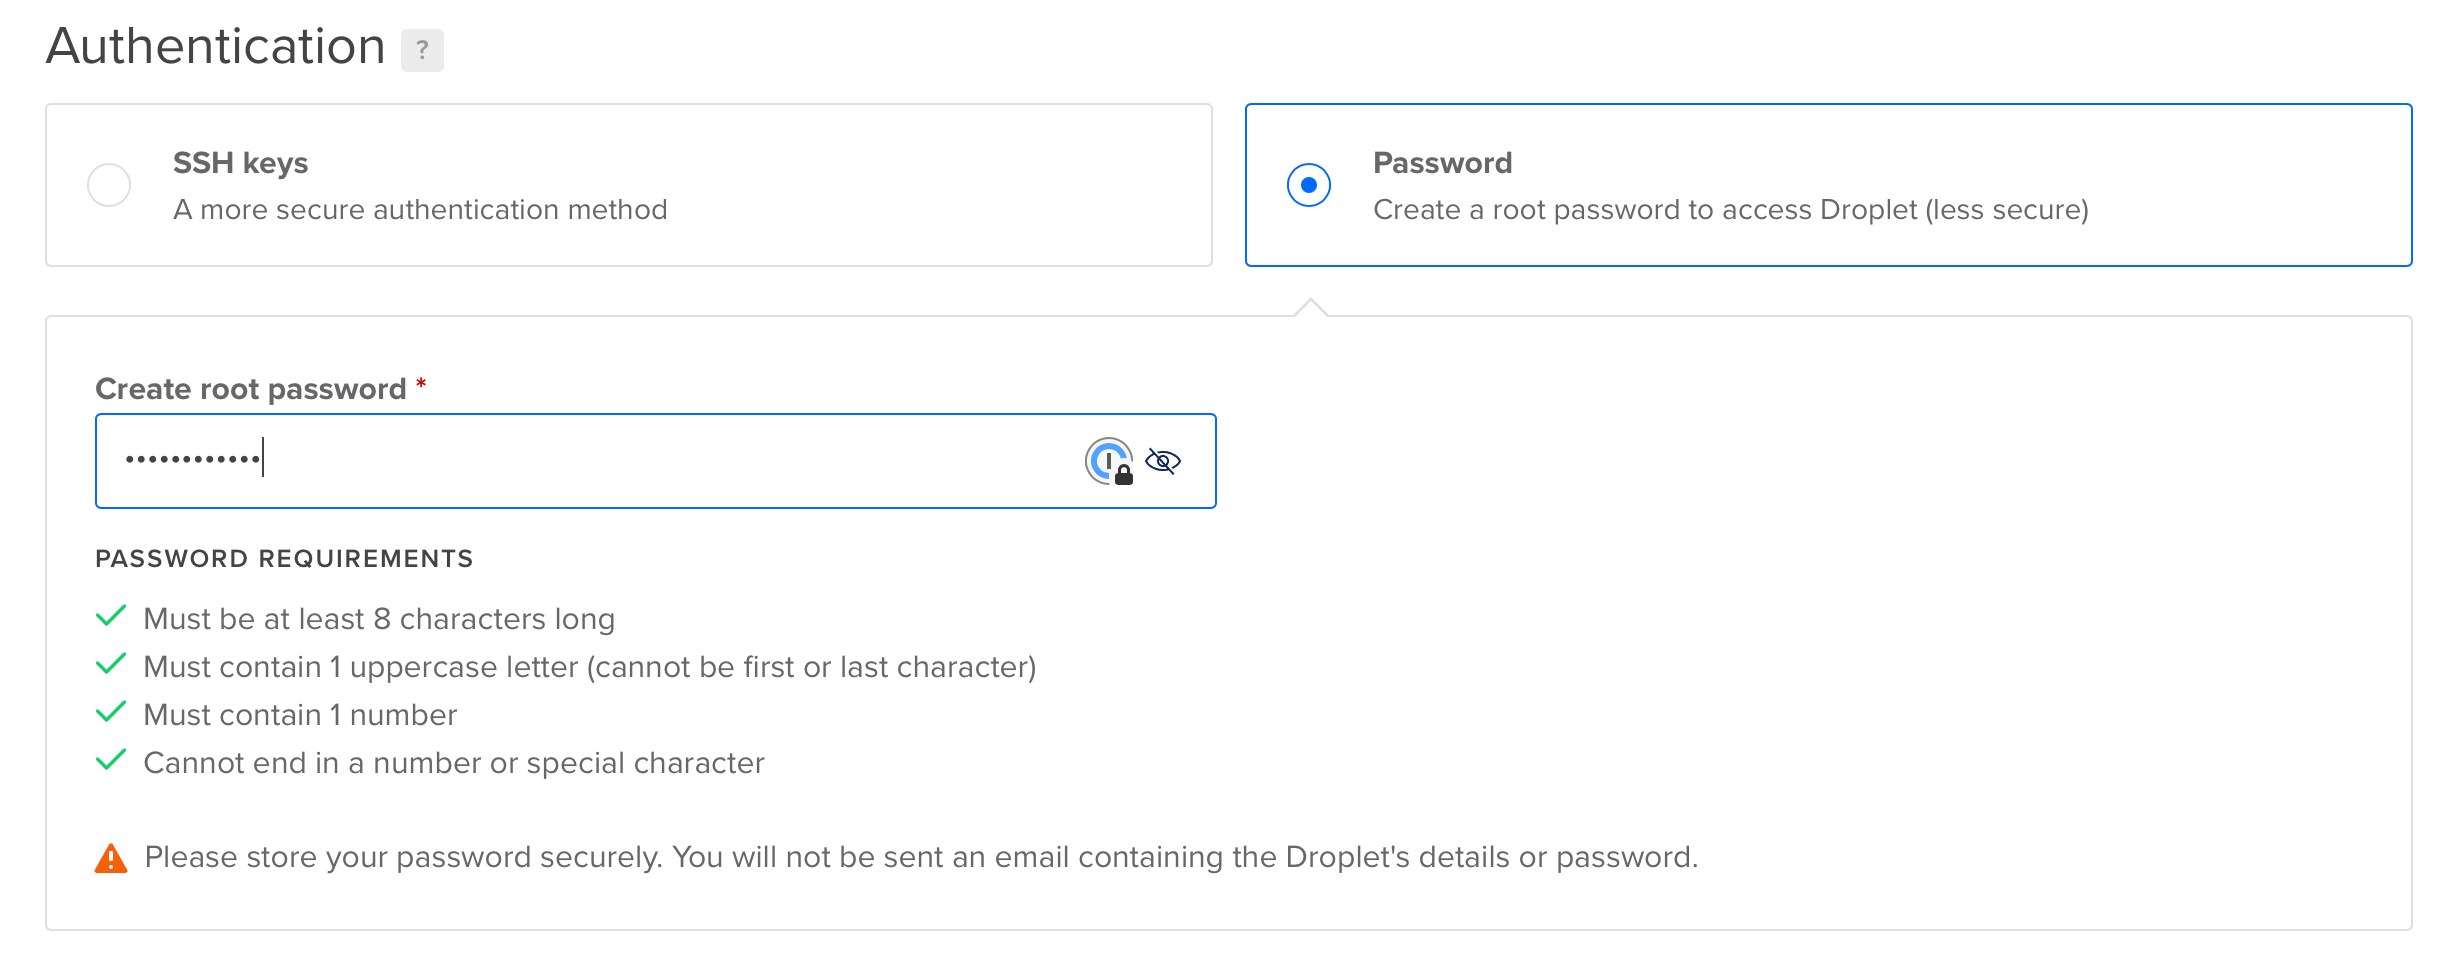
Now we need to decide our authentication method, normally we'd recommend using SSH Key authentication as it is a securer way of authenticating with your server. However, for the purpose of keeping this guide concise we are going to choose Password authentication. If you feel comfortable in dealing with SSH Keys feel free to select that option and follow the on screen instructions, otherwise enter a secure password following DigitalOceans requirements.
After the authentication selection, you have the choice to select some additional options such as backups (for an extra cost), monitoring, IPv6 or User Data. We don't need any of these for this guide, but select those if you have a need for them.
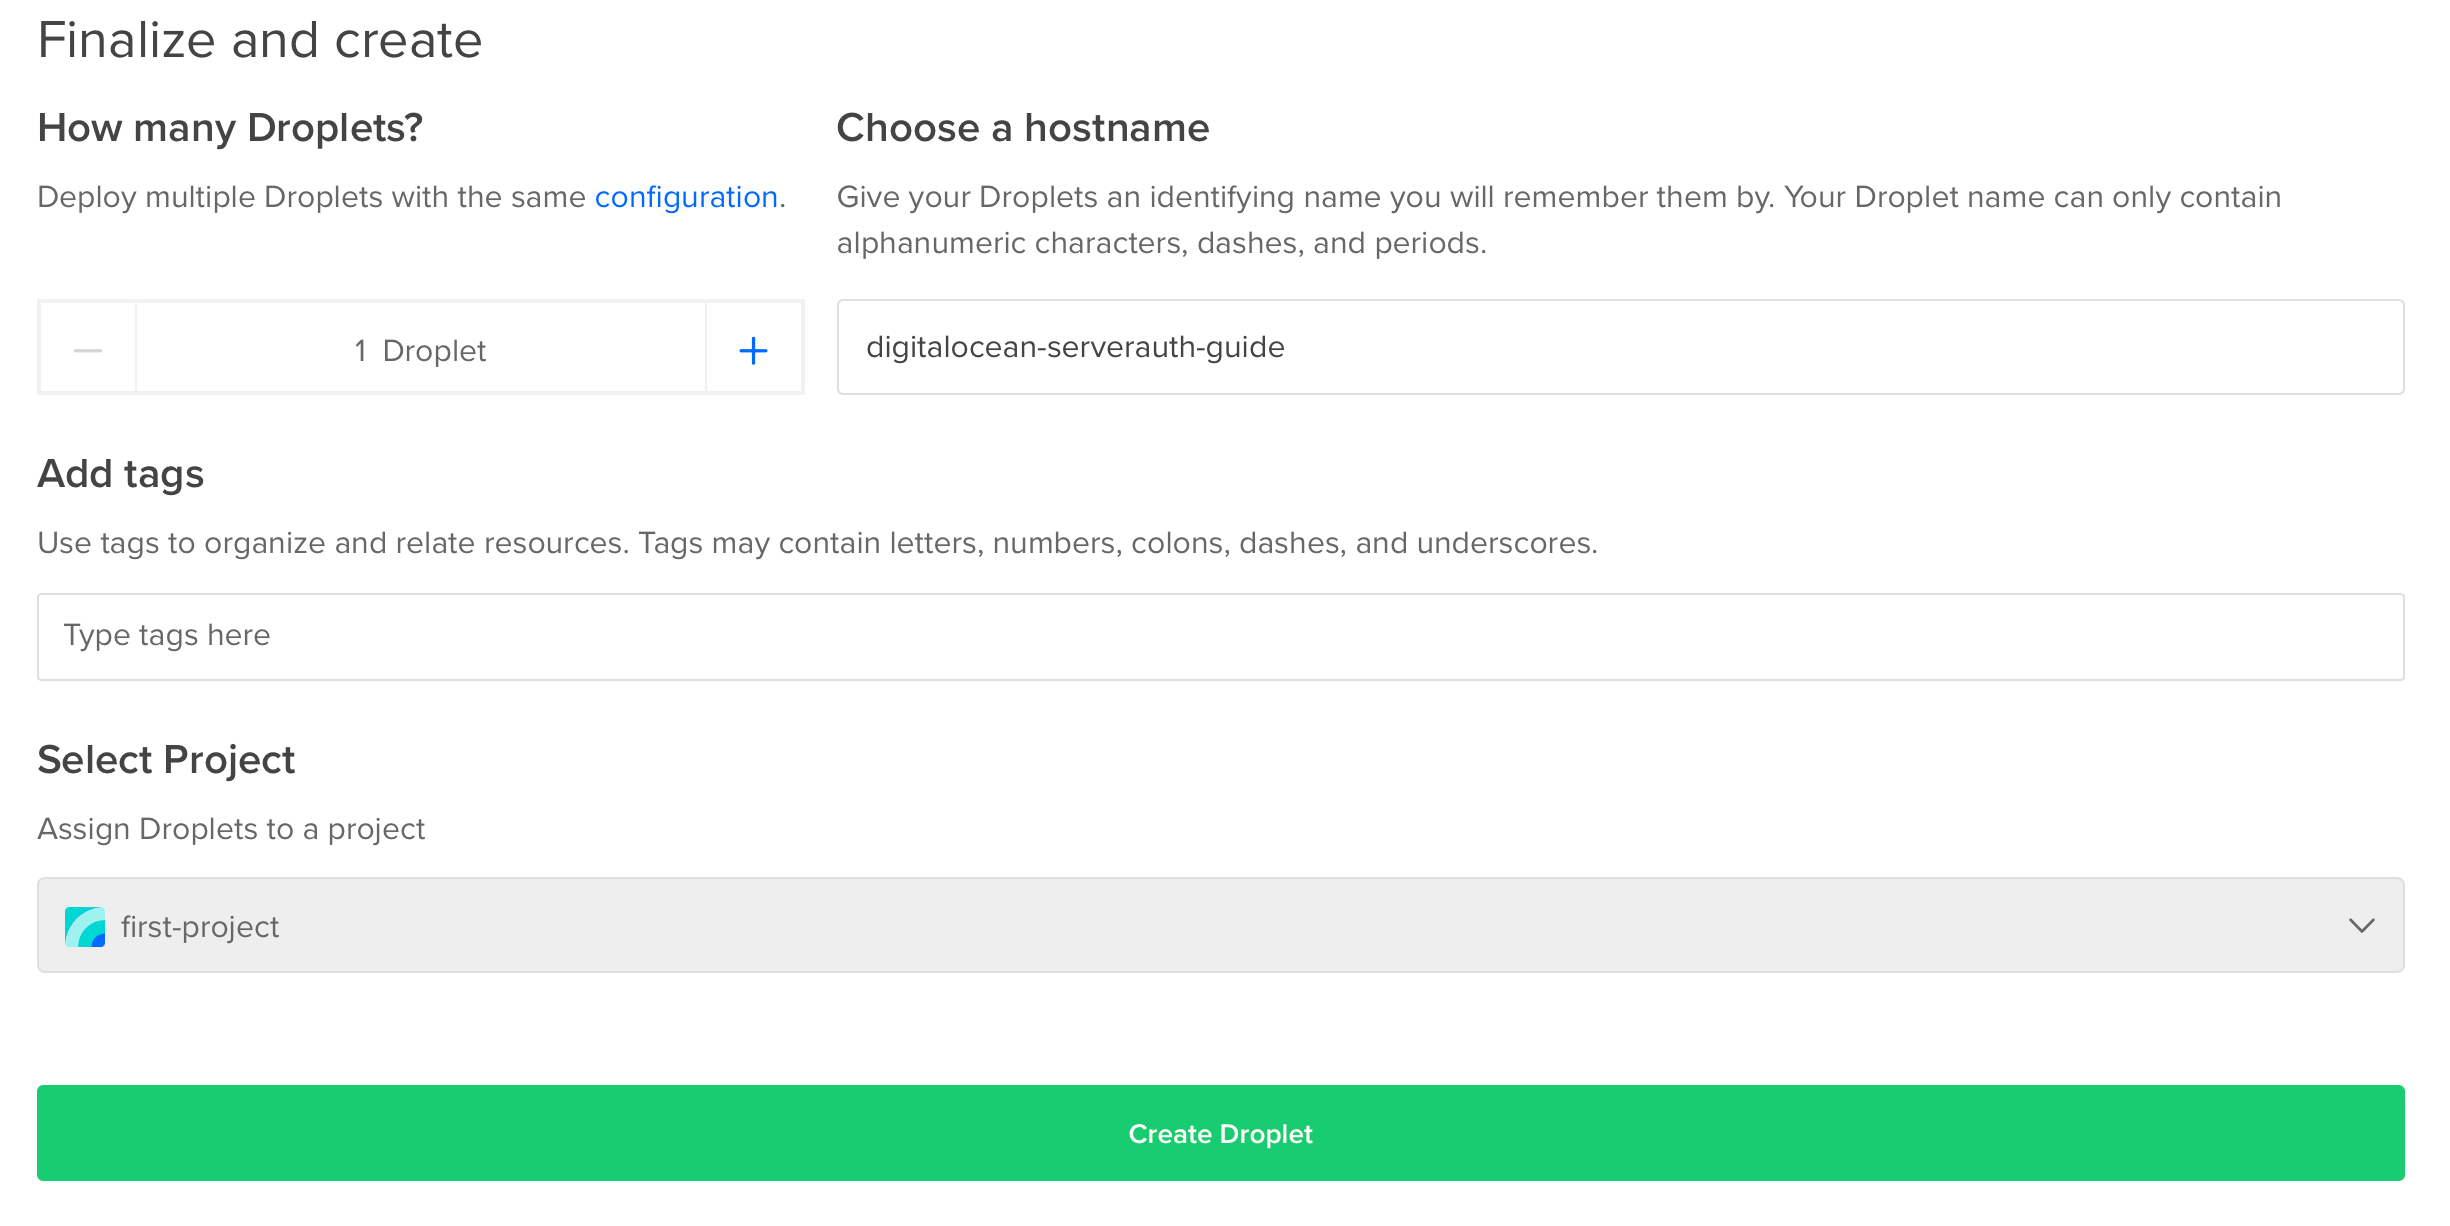
Lastly, select how many identical droplets you want to create and choose a hostname for them. You can also add any tags to help group and organise your resources. Once done, submit the form with the "Create Droplet" button!
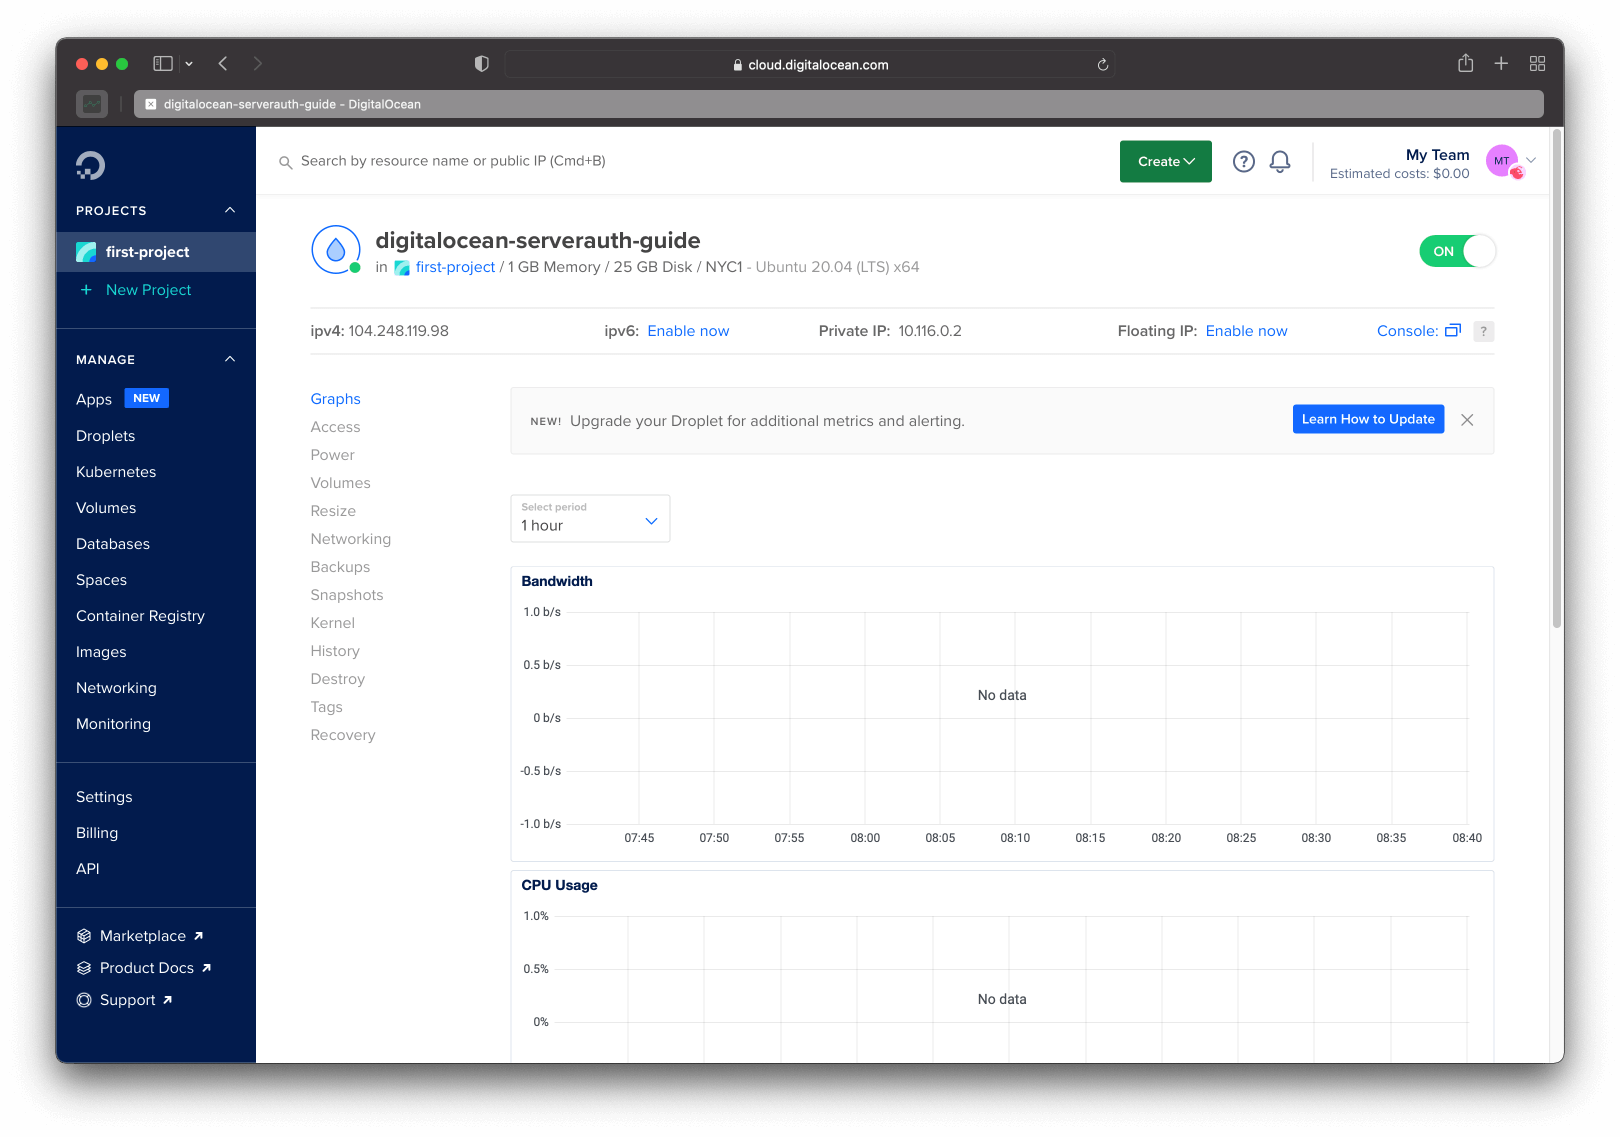
Your page will refresh and you will be shown a loading bar while DigitalOcean sets up and configures your server. When it's done and ready, your page should look something like this!
Now we're ready to integrate in ServerAuth!
When first login to ServerAuth you'll be presented with a page like this:
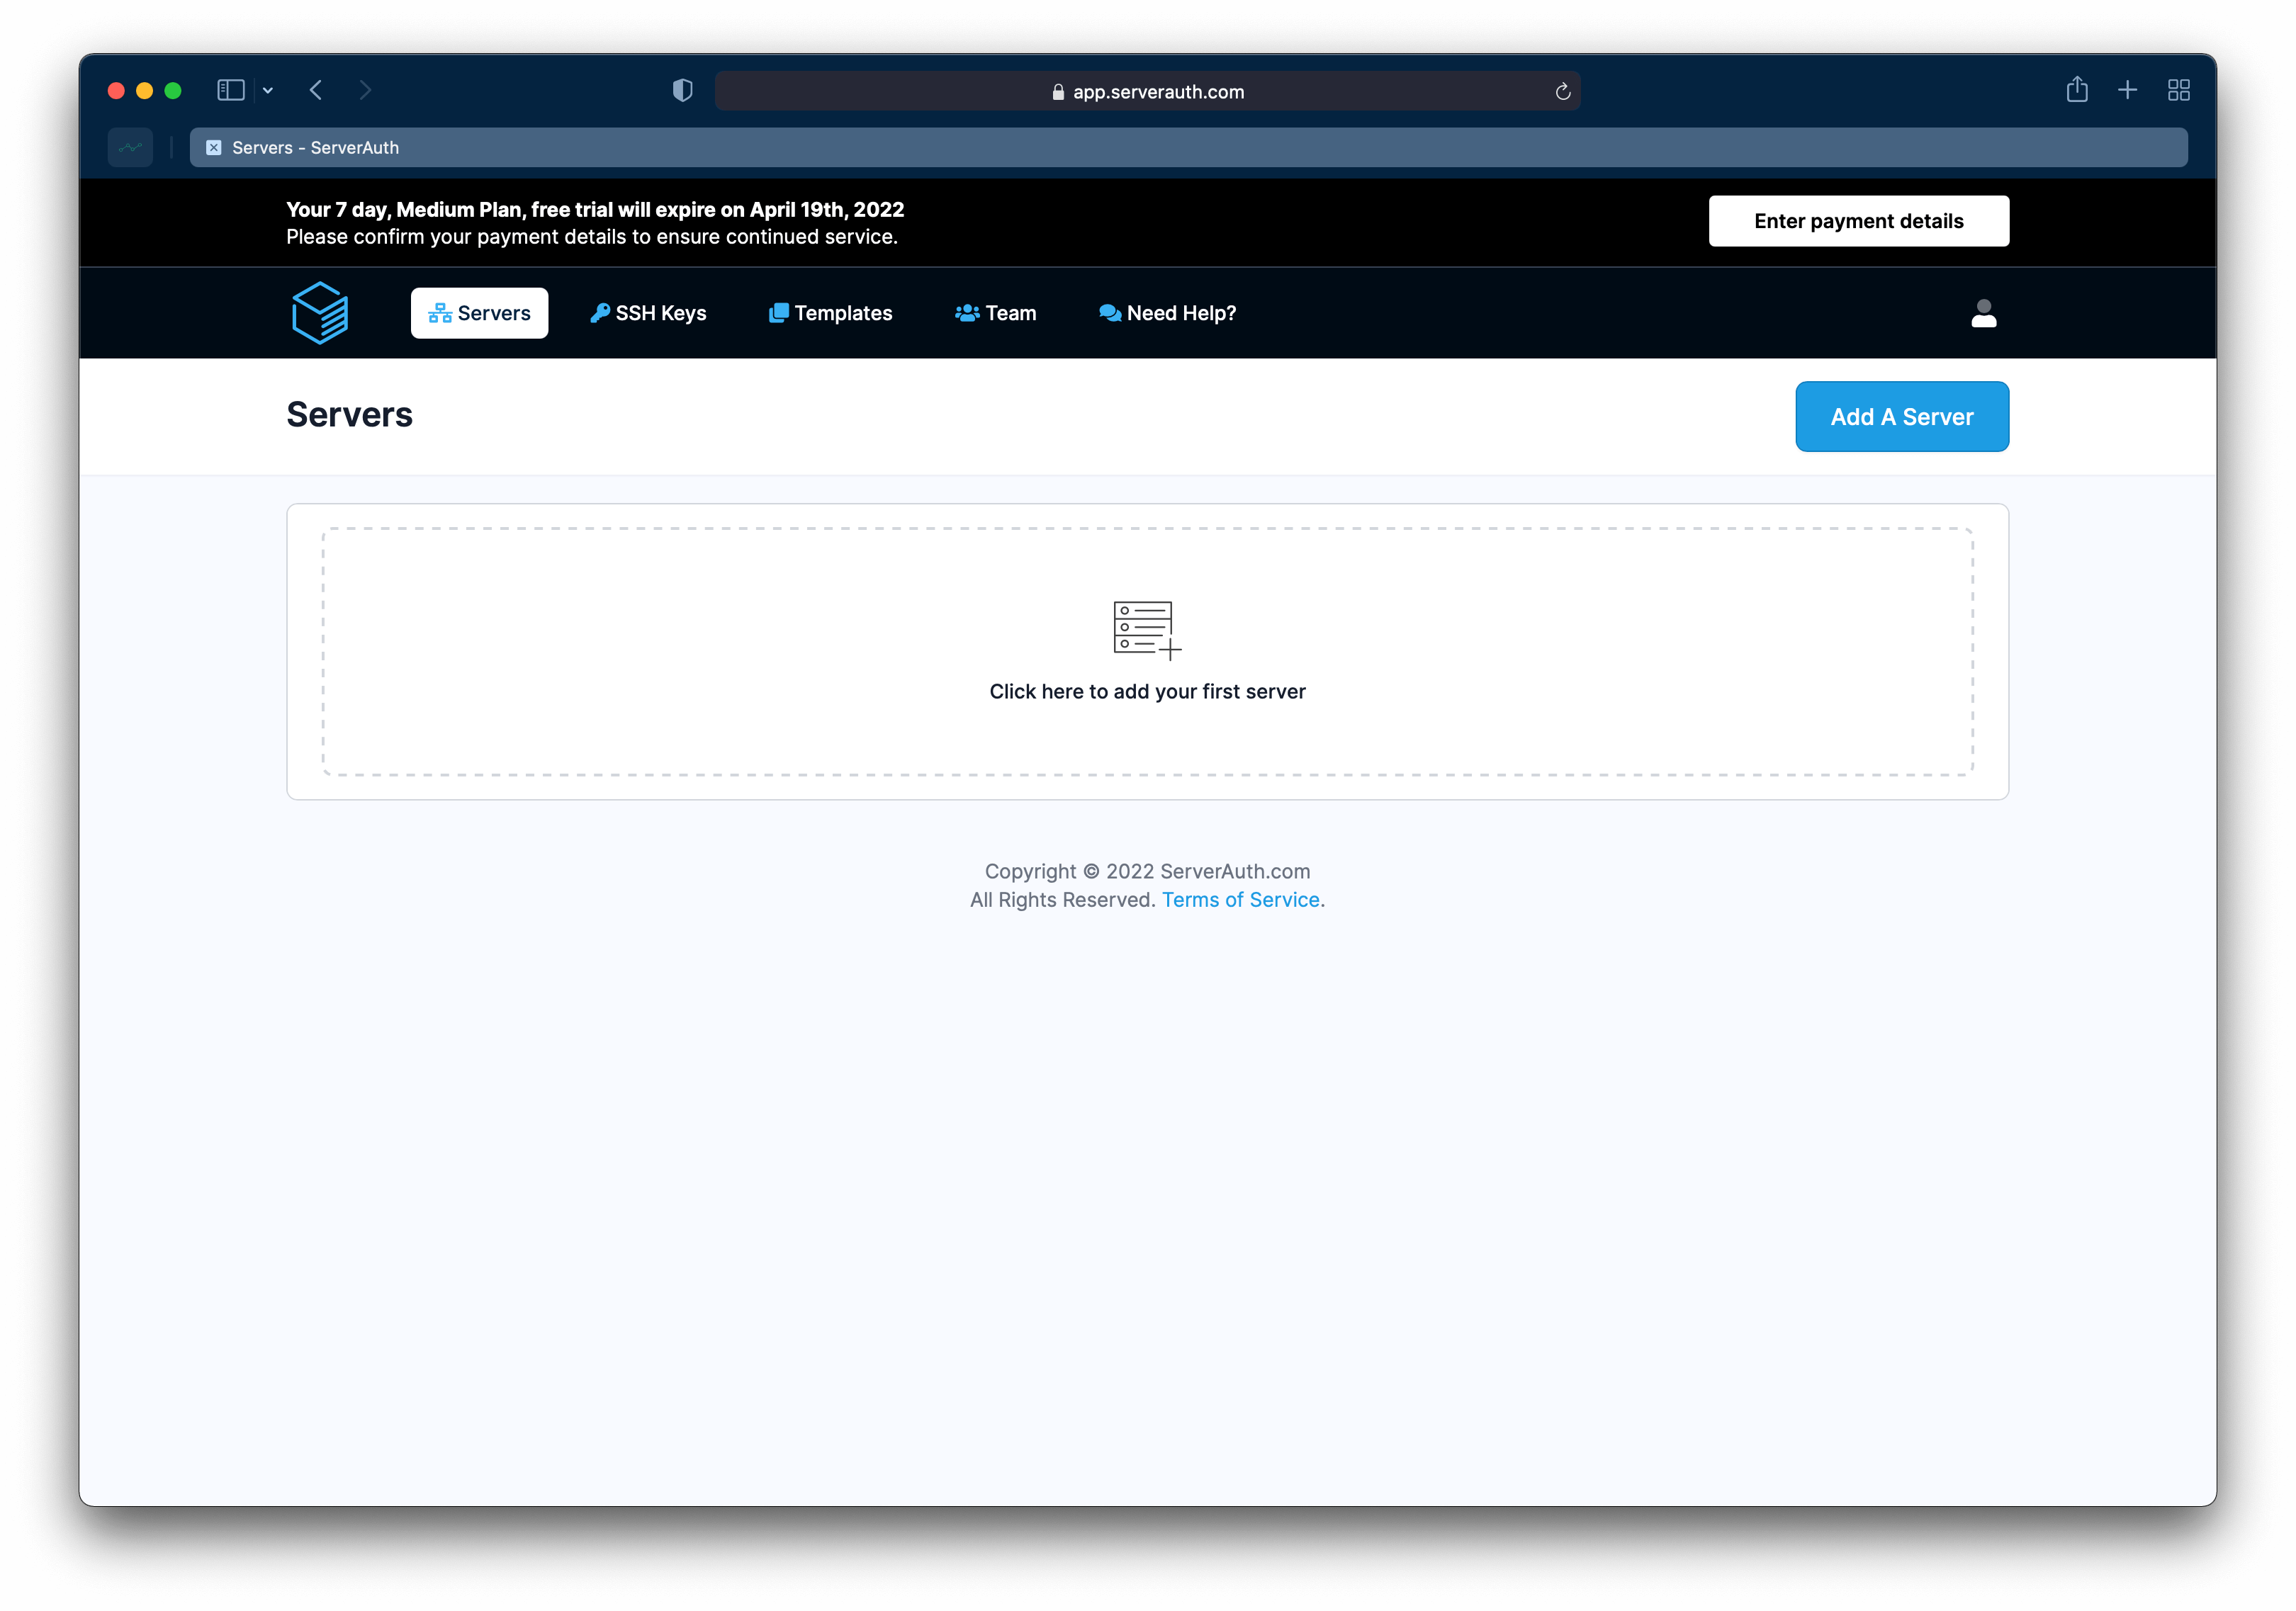
Either click the "Add a Server" button or click inside the main content area to add your first server. You'll be taken to a page to select the Operating System of your server and the integration type.
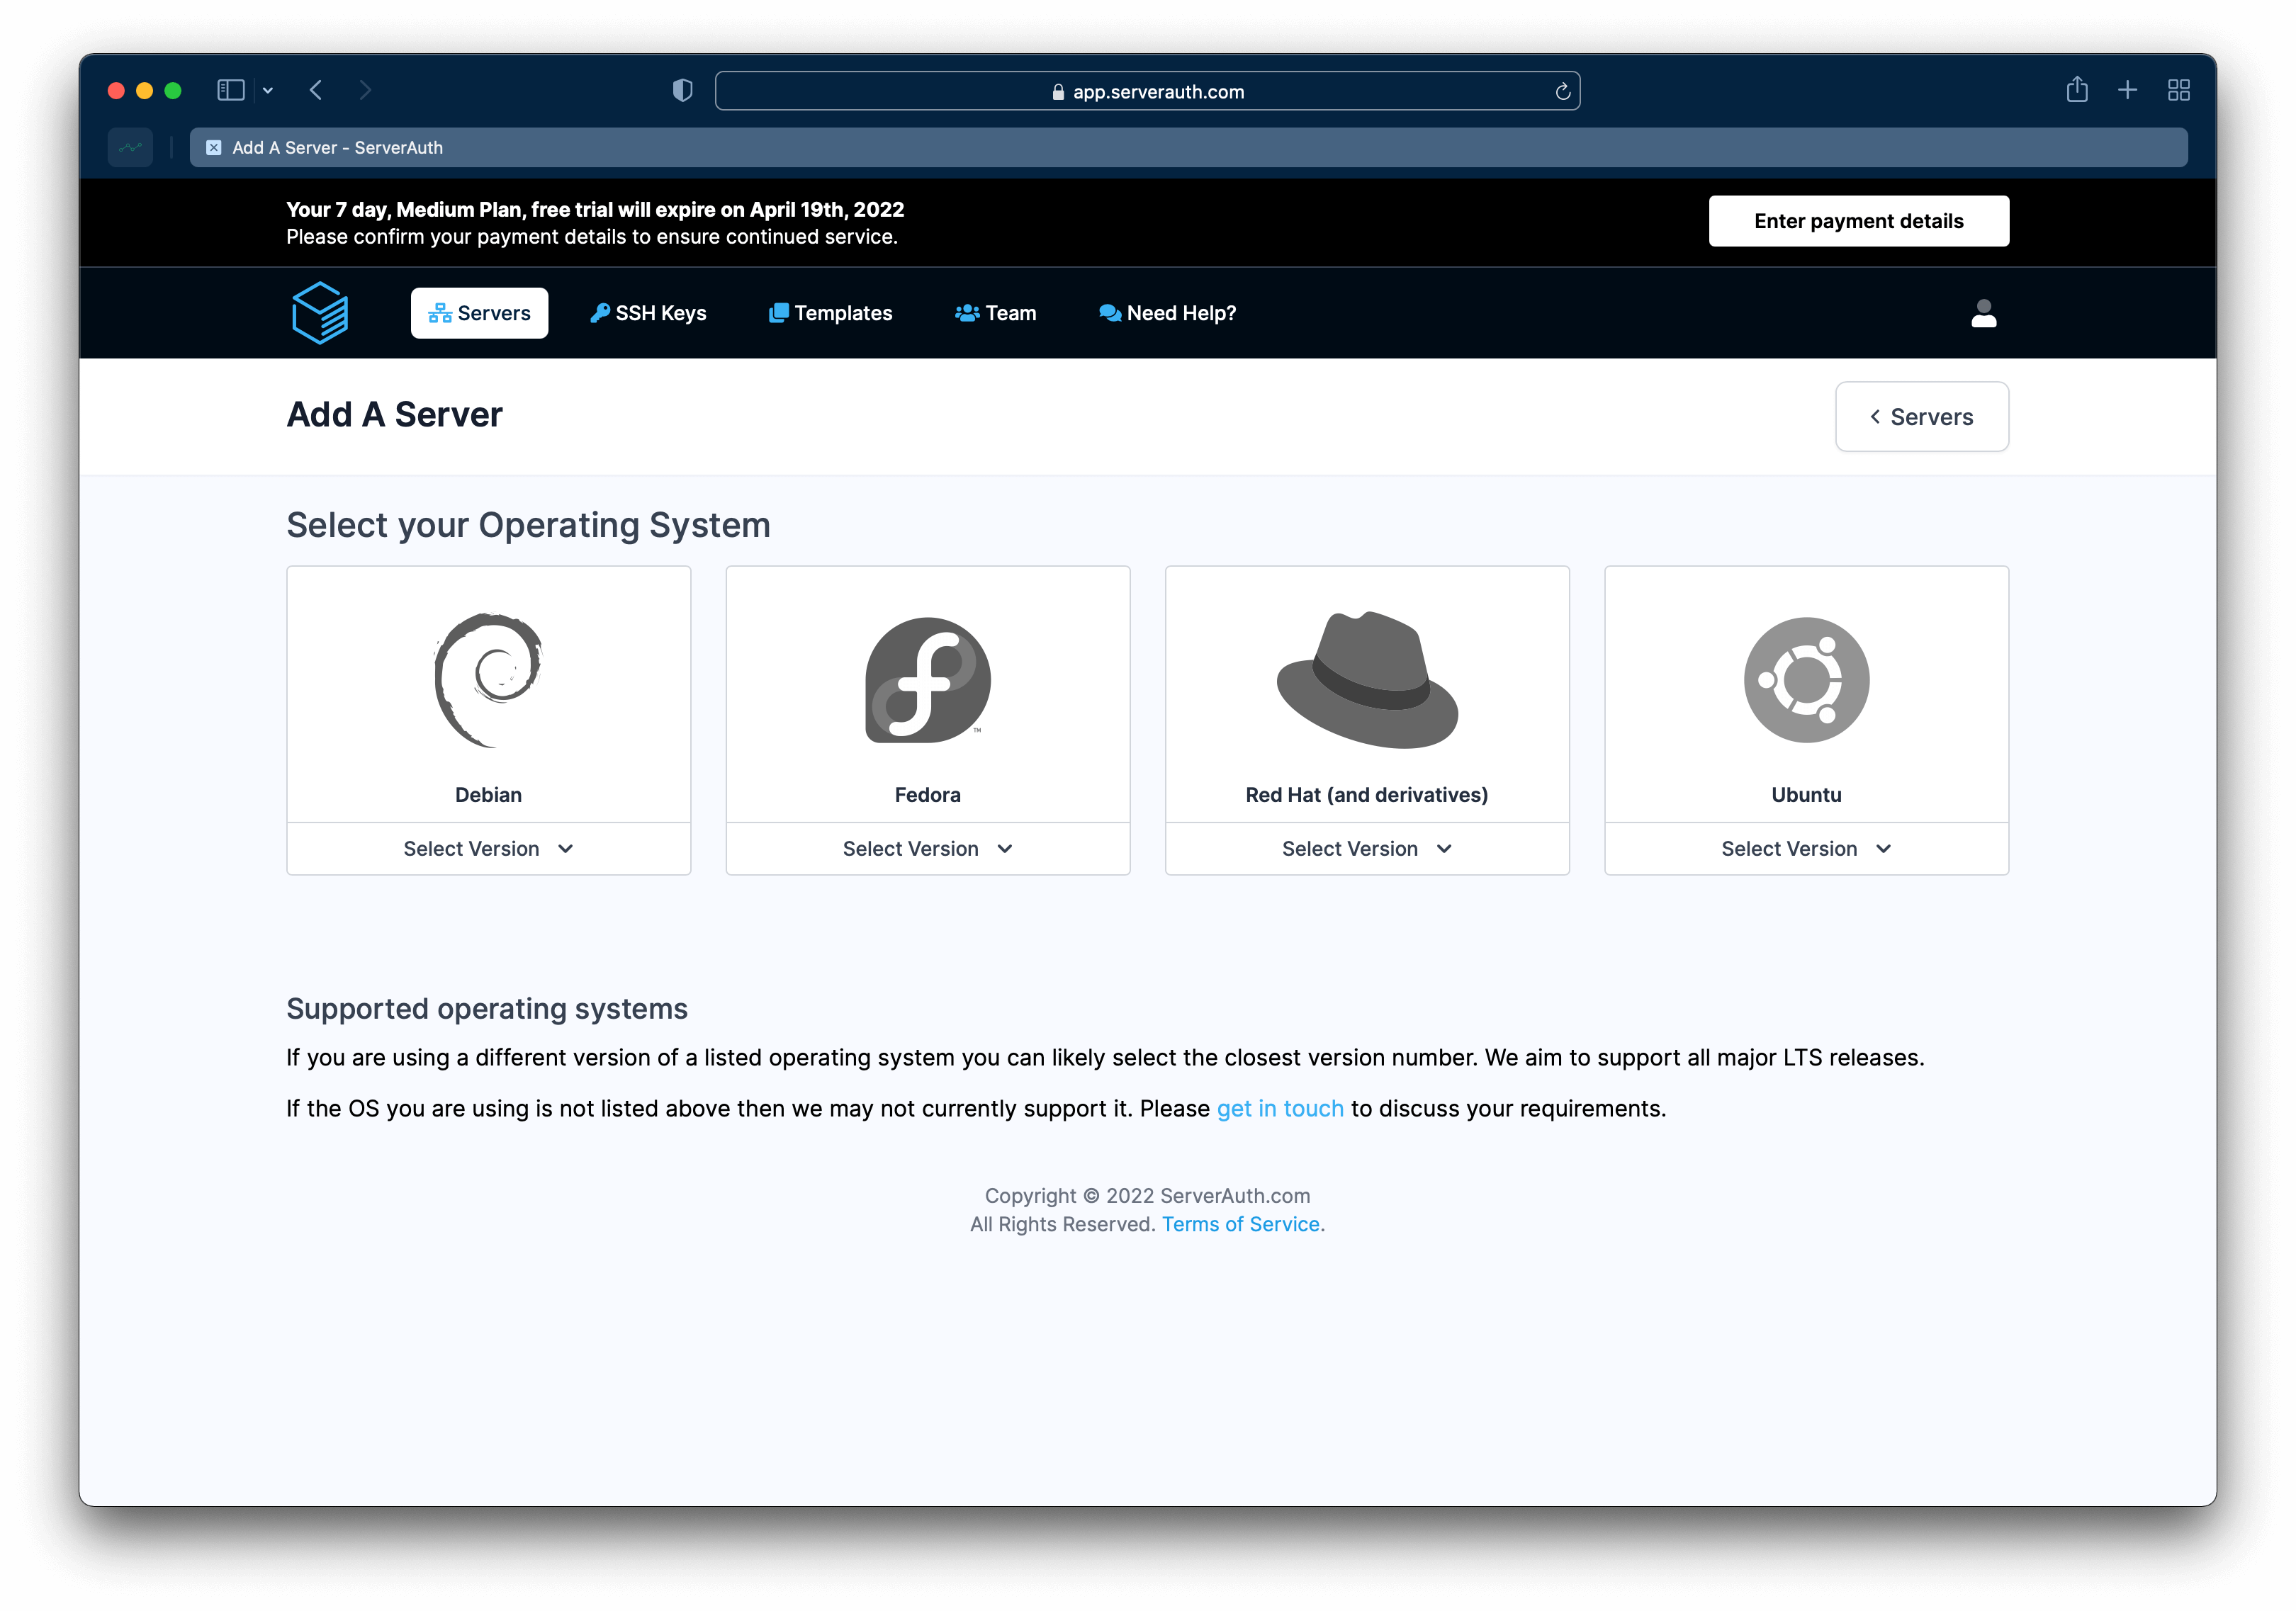
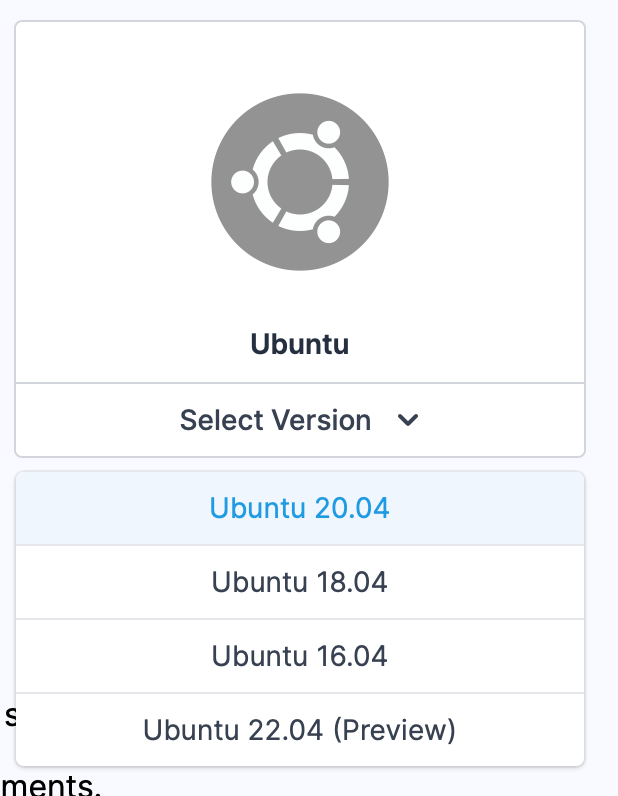
We created our server using Ubuntu, so select that and a dropdown will appear to select the version. We installed 20.04, so select that.
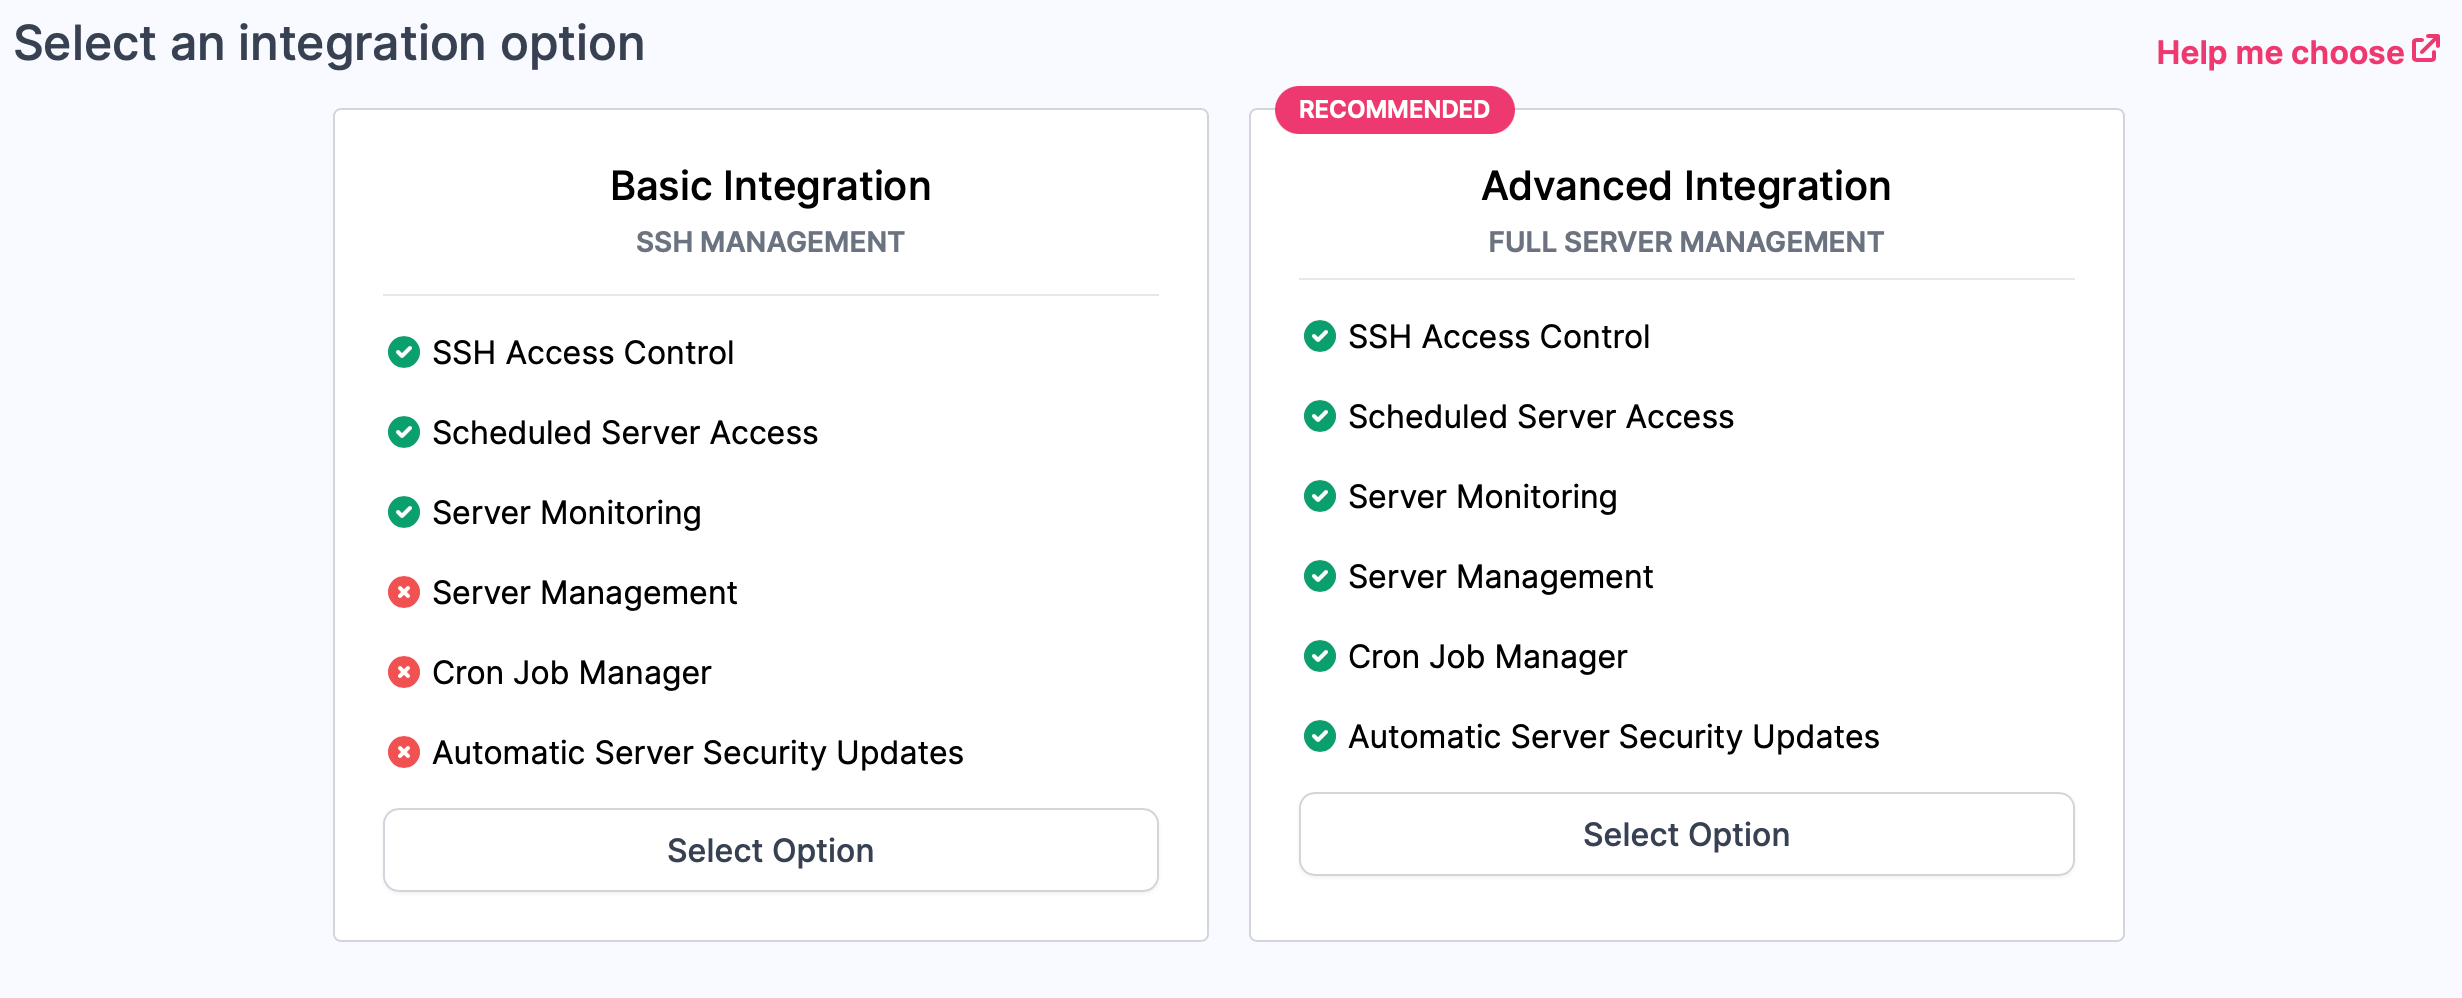
Once you have selected the version, our system tells you the available integrations. You can read more on the differences in our guide here. We'll be selecting the Advanced Integration.
The advanced integration has a 3 step form to guide you through integrating ServerAuth into your server. The first step is confirming the operating system you selected, entering a friendly name so you can recognise the server in your server list, select any users you want to manage SSH access for and assign server tags if you have any set up.
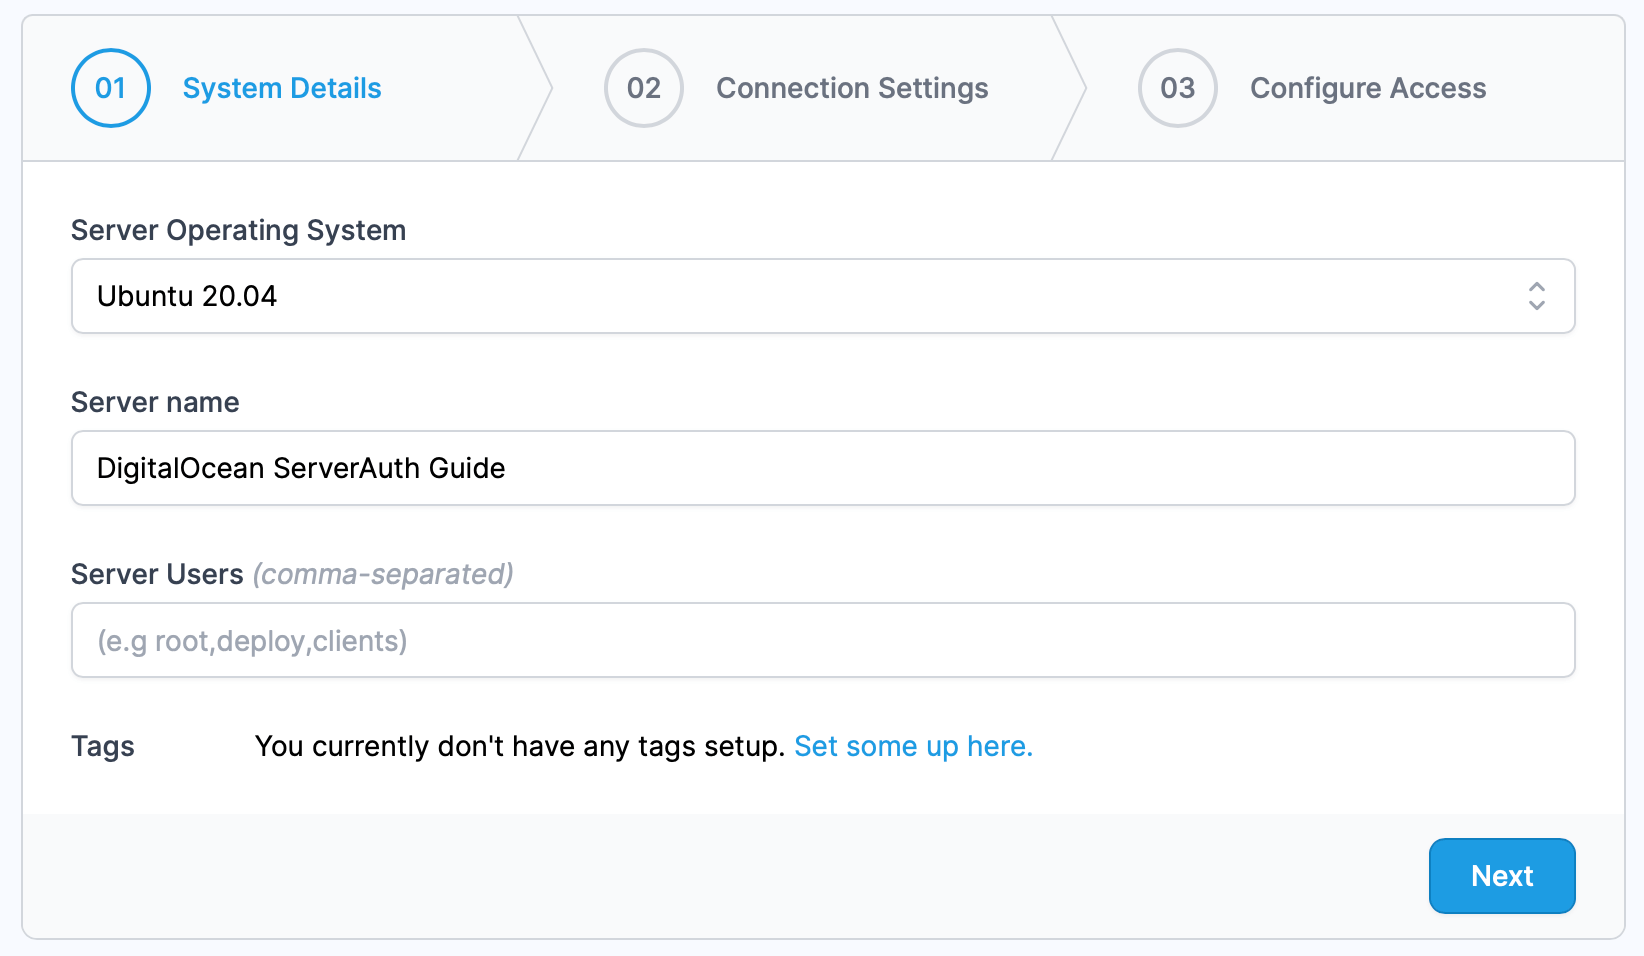
Once filled in, press Next to head to the next step.
In this next step we need to know the first part of the connection information. We need the server IP address which can be copied from your DigitalOcean page (near the top, it will be labeled ipv4 and you can click it to copy it), the SSH connection port which as default will be 22 (and should have been prefilled on the ServerAuth form for you. Lastly we need to know which user to connect as. This needs to be the root user or a user that has sudo access on your server.
In our example we only have the root user available as we have not yet created any other users on the server so we will use that.
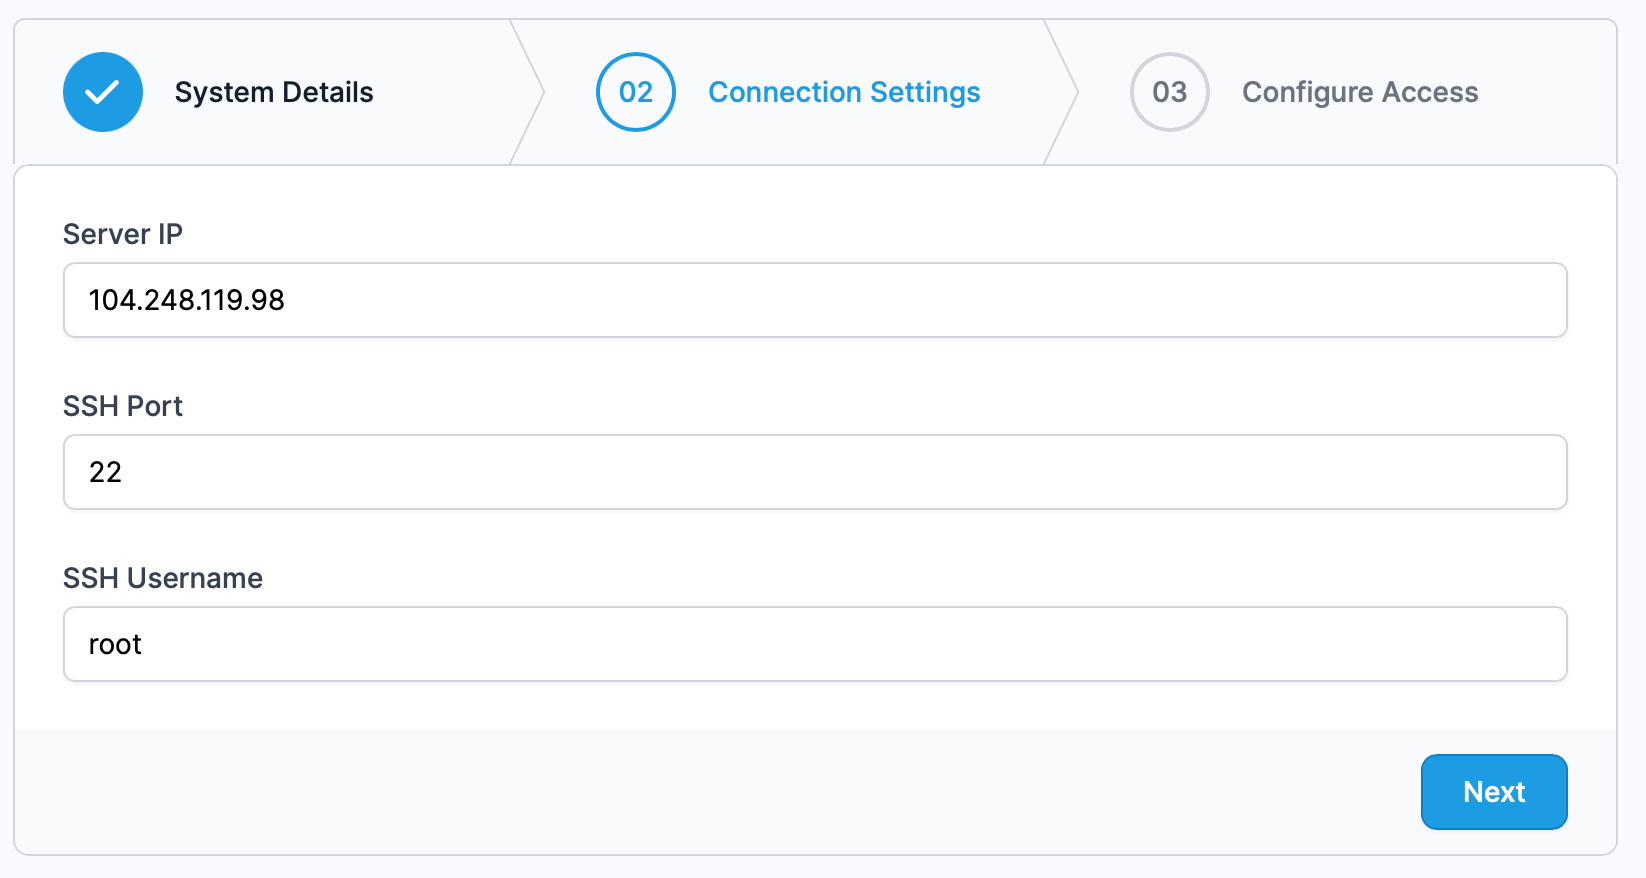
Before clicking Next on this step, it's worth noting our IP addresses listed in the sidebar of this step. Our system has two static IP addresses which we will connect to your server from. In this example we aren't, but if your server is locked down behind a firewall, make sure our IP addresses are added to the allow list so we can connect.
On the last step, we need to configure access by specifying how we should authorise with your server! If you remember, during the DigitalOcean step we had to select the authorisation method, while we recommend using SSH Keys for the purpose of keeping this guide concise, we chose the password method.
Choose the password option here and enter the same password you chose while creating the droplet on DigitalOcean's control panel.
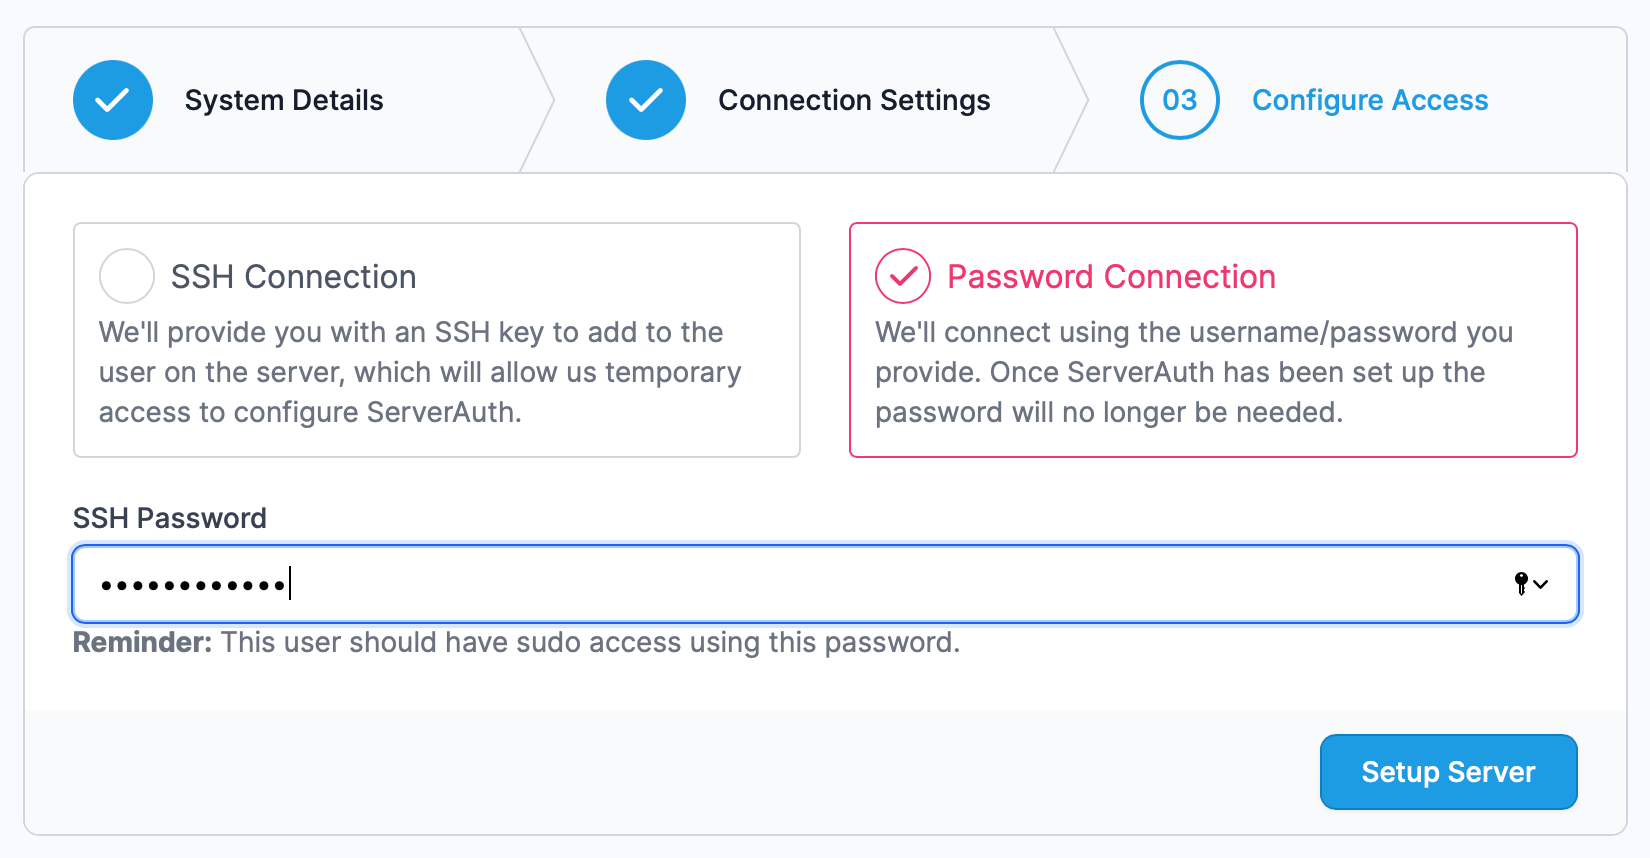
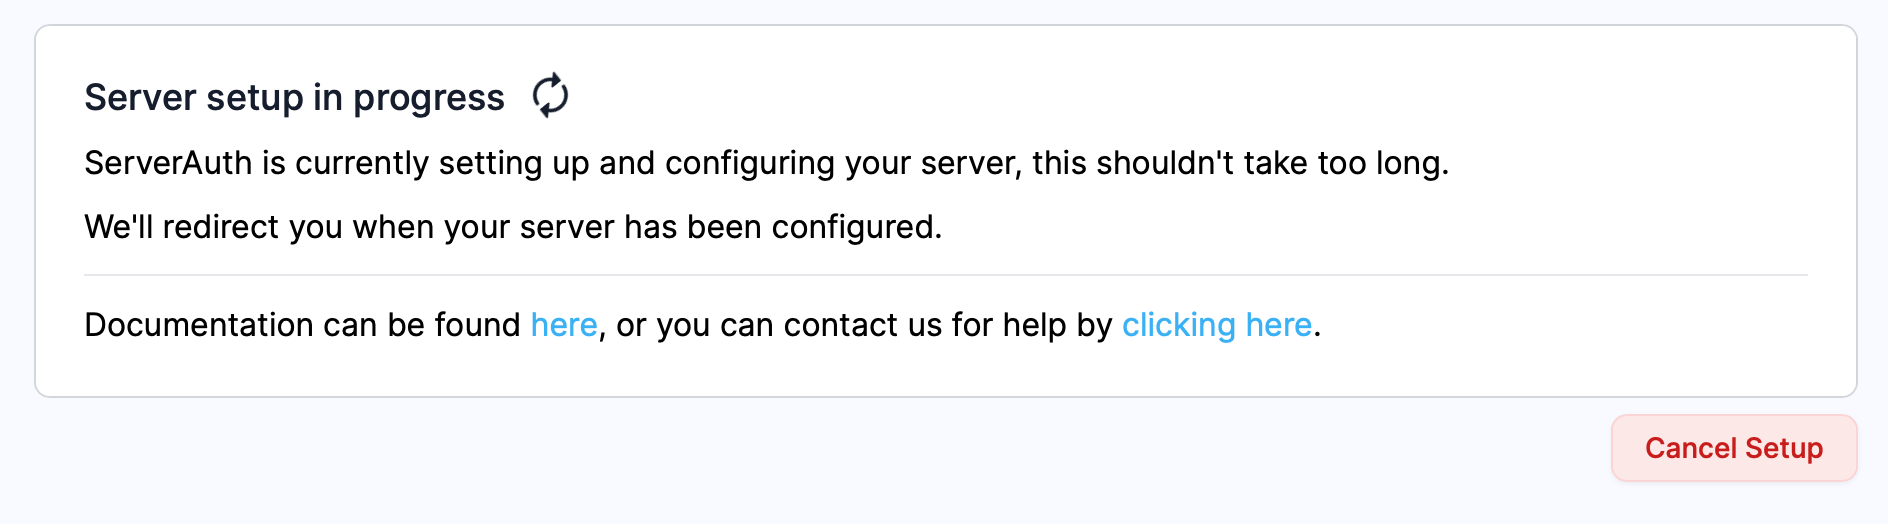
Once entered, click the button to "Setup Server". Our systems will now attempt to connect to, and integrate with your server. During this setup process you'll see our pending setup screen. If for some reason it takes too long or fails completely, you can cancel the setup which will delete the server from our system (it will not delete the server from DigitalOcean) and allow you to start the integration again.
Assuming everything is successful, you will be automatically redirected to the server management screen for your newly integrated server!
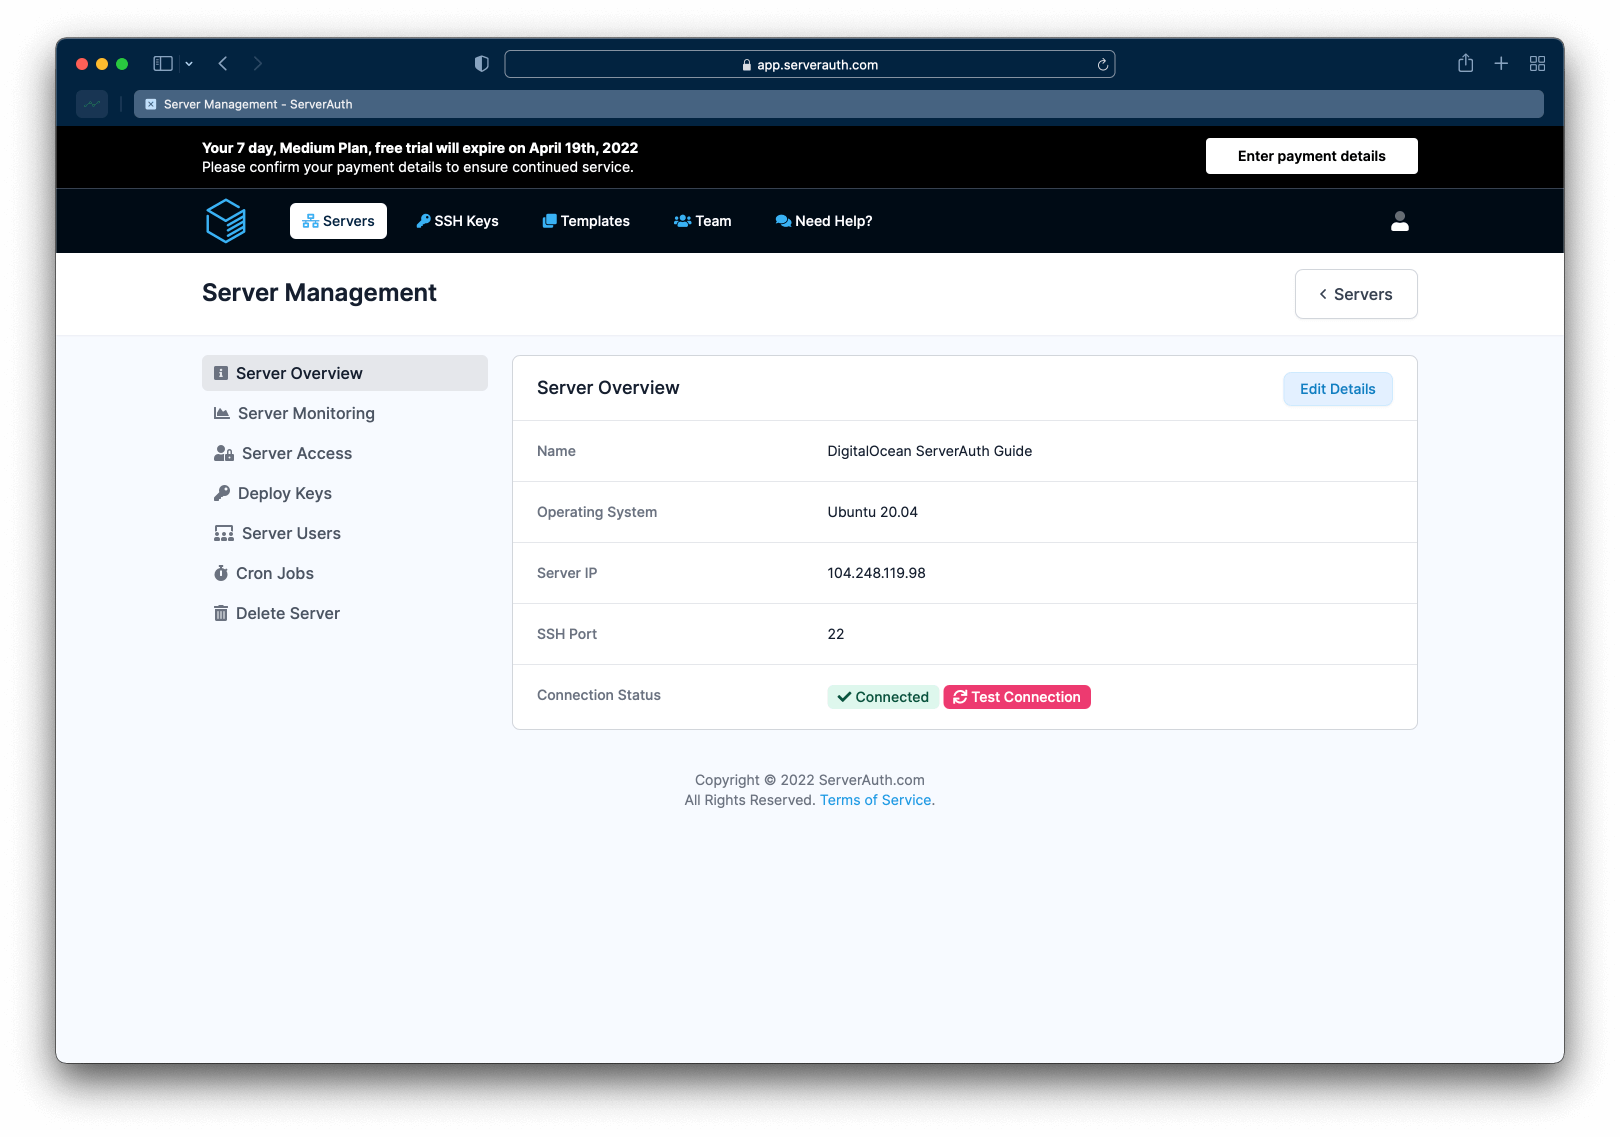
Integration is now complete. You can use the left menu to access the various options available and start managing your server like a pro!
Check out our help site for more information or assistance on using parts of the system. Alternatively, if you can't find the answer you're looking for, within the ServerAuth platform, you should see the "Need Help?" link in the header. Use this to get in touch with us and we'll do our best to answer any questions you have!
ServerAuth provides a whole host of management tools, from controlling who can access your server, to managing your website deployments. And with an ever-growing suite of tools you'll always be one step ahead!
Start for free
