If you're building a website or web application, you'll quickly come across two essential tools: Nginx and PHP. Together, they form a powerful, reliable stack for both simple sites and large-scale web applications. In this guide, we'll cover why you should consider using Nginx and PHP, and walk you through how to install and configure them on Ubuntu 24.04 with PHP 8.3. To make things even easier, we’ll show you how ServerAuth can streamline this process for you.
First, let’s explore why Nginx and PHP are such a popular combination in the web development world.
Nginx is a highly efficient, high-performance web server that’s perfect for handling heavy traffic with minimal resources. Whether you’re running a small site or an enterprise-level app, Nginx can scale with your needs.
PHP has been a cornerstone of web development for decades. It powers major platforms like WordPress, Magento, and Drupal. With the latest version, PHP 8.3, it’s more powerful and flexible than ever.
Nginx shines when serving static content like HTML, images, or CSS files, while PHP handles dynamic content generation. Nginx sends PHP requests to PHP-FPM (FastCGI Process Manager), resulting in an optimized, fast, and secure server setup.
Ready to set up Nginx and PHP 8.3 on your server? Here’s a step-by-step guide to get you started.
Before installing anything, make sure your server is up to date. Run the following commands:
sudo apt update
sudo apt upgrade
To install Nginx, run:
sudo apt install nginx
Once installed, start Nginx and enable it to start on boot:
sudo systemctl start nginx
sudo systemctl enable nginx
At this point, you can check if Nginx is running by visiting your server’s IP address in a browser. You should see the default Nginx welcome page.
Next, install PHP 8.3 and the PHP-FPM module to allow Nginx to process PHP scripts.
sudo apt install php8.3-fpm
This will install PHP 8.3 along with PHP-FPM, which is required for Nginx to communicate with PHP.
Now that both Nginx and PHP are installed, we need to configure Nginx to process PHP files. Open the default Nginx server block file:
sudo nano /etc/nginx/sites-available/default
Find the section that handles PHP and modify it like this:
location ~ \.php$ {
    include snippets/fastcgi-php.conf;
    fastcgi_pass unix:/var/run/php/php8.3-fpm.sock;
}
Make sure that the fastcgi_pass directive is pointing to the correct PHP 8.3 socket.
Save the changes and restart Nginx to apply them:
sudo systemctl restart nginx
To check if everything is working, create a simple PHP file:
sudo nano /var/www/html/info.php
Add this content to the file:
<?php
phpinfo();
?>
Now, visit http://your_server_ip/info.php in your browser. If you see a PHP info page, congratulations! Nginx and PHP are set up and working correctly.
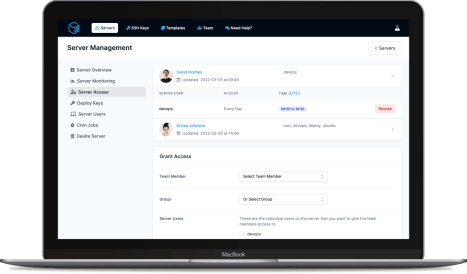
While installing Nginx and PHP yourself is totally doable, it can become a hassle — especially when you need to manage multiple servers or ensure that your configuration is perfect for production. That’s where ServerAuth comes in.
With ServerAuth, you can deploy and manage your Nginx and PHP environment with just a few clicks, saving time and avoiding manual configuration headaches.
Whether you’re a developer or a business owner, ServerAuth makes managing your servers simpler, faster, and more secure. Get started today and see how much easier server management can be!
By using Nginx and PHP together, you’re setting yourself up for a fast, reliable, and scalable web environment. And with ServerAuth, you can take that a step further—letting us handle the complexity while you focus on growing your site or app.
ServerAuth provides a whole host of management tools, from controlling who can access your server, to managing your website deployments. And with an ever-growing suite of tools you'll always be one step ahead!
Start for free

