
In this guide we'll be showing you how to navigate the Hetzner Cloud control panel so you can create your own server and integrate it into ServerAuth for easier server management.
For the purpose of this guide, we'll assume you already have accounts with Hetzner and ServerAuth. If not, do that now before proceeding.
If you prefer a more automated approach then skip ahead to the Easier alternative setup. With this method we create the server on your behalf using the Hetzner API.
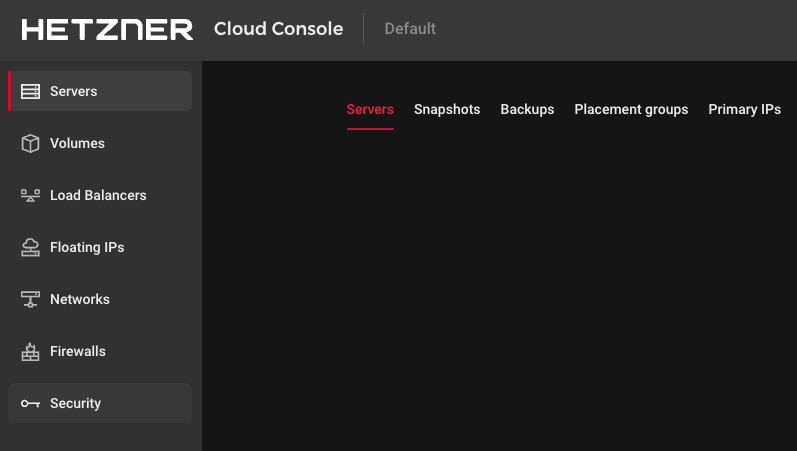
When you first login to hetzner you want to ensure you are logging in to the Cloud section of Hetzner. In doing so, you should see a screen similar to this.
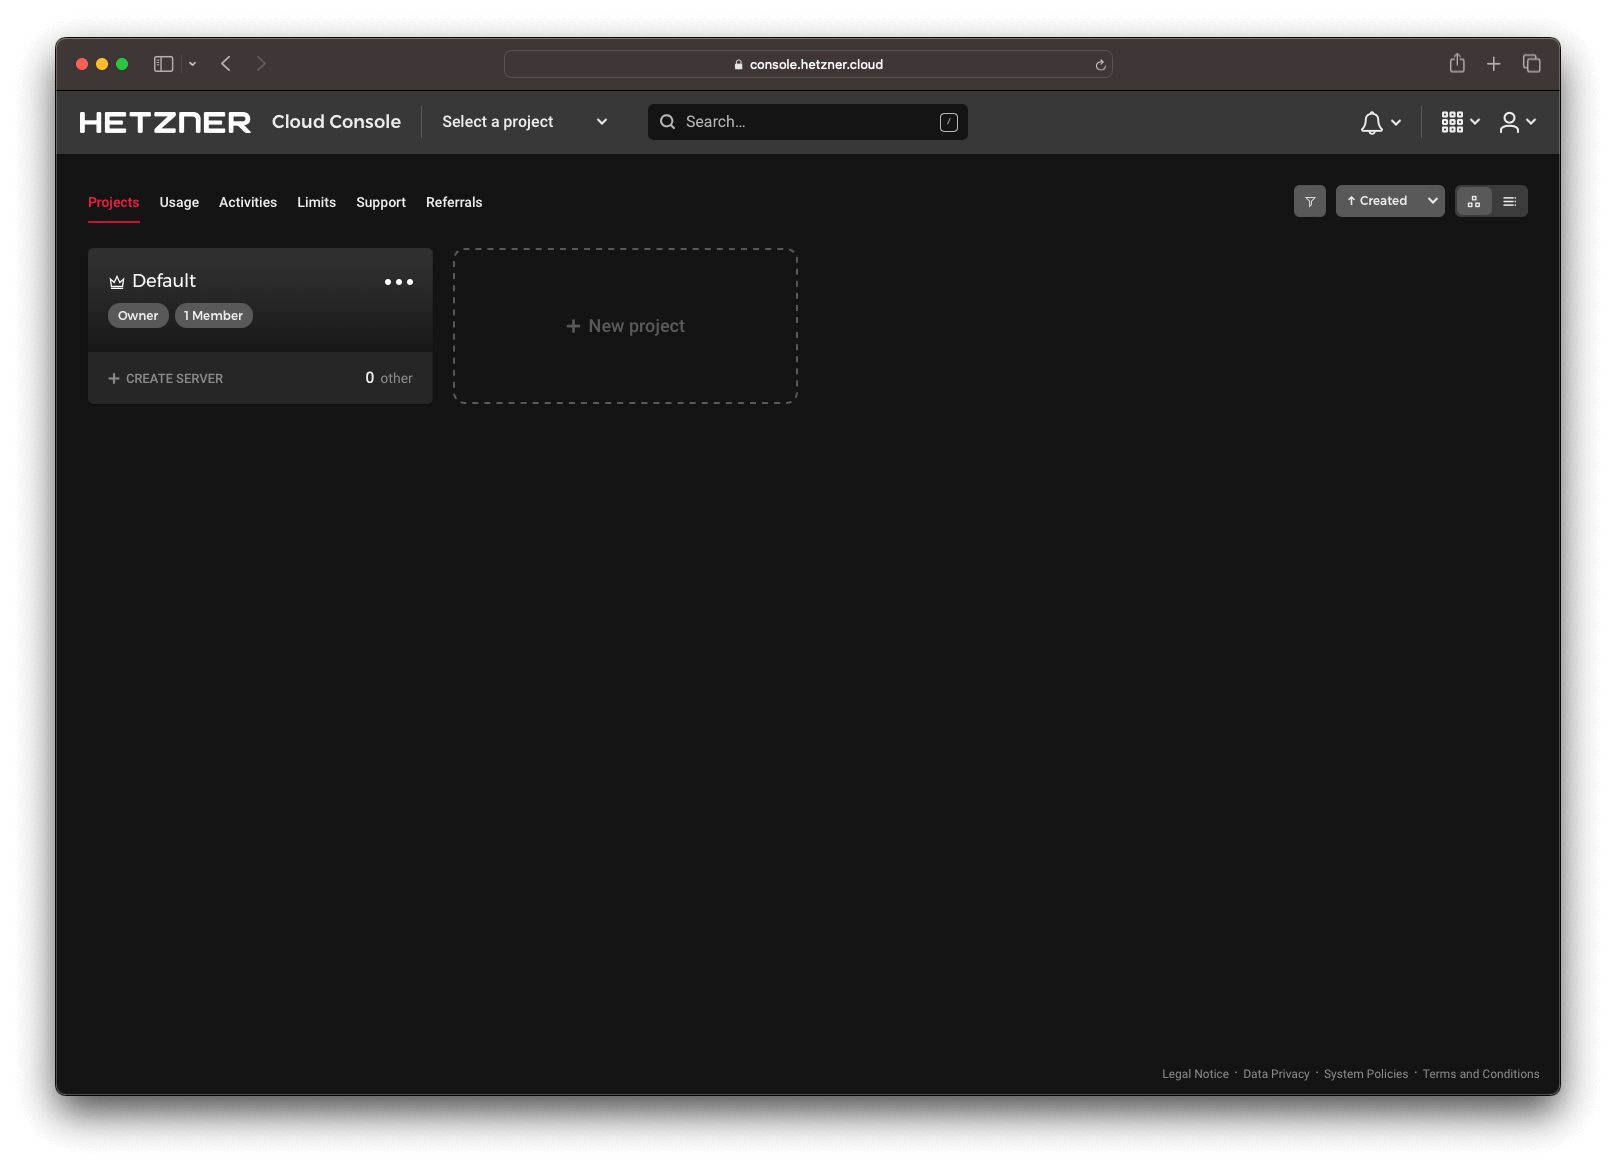
To help get you started, Hetzner create a Default project for you. A project is essentially a wrapper for servers and their configurations. This allows you to group related servers together and isolate them from different projects in your account.
For this guide, we'll use the Default project Hetzner create for you, but if you wish create a new project before proceeding.
To create your first server, click the "+ Create Server" link within the project box.

This will take you to the page to create your server with Hetzner. The first step of which is to select which location you wish to use.
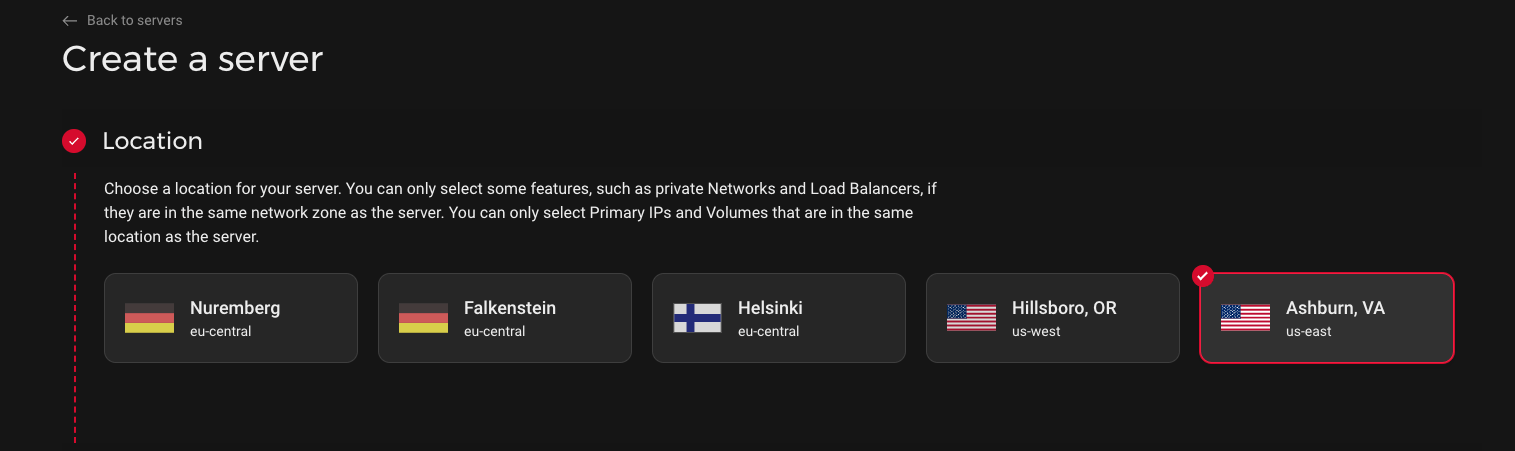
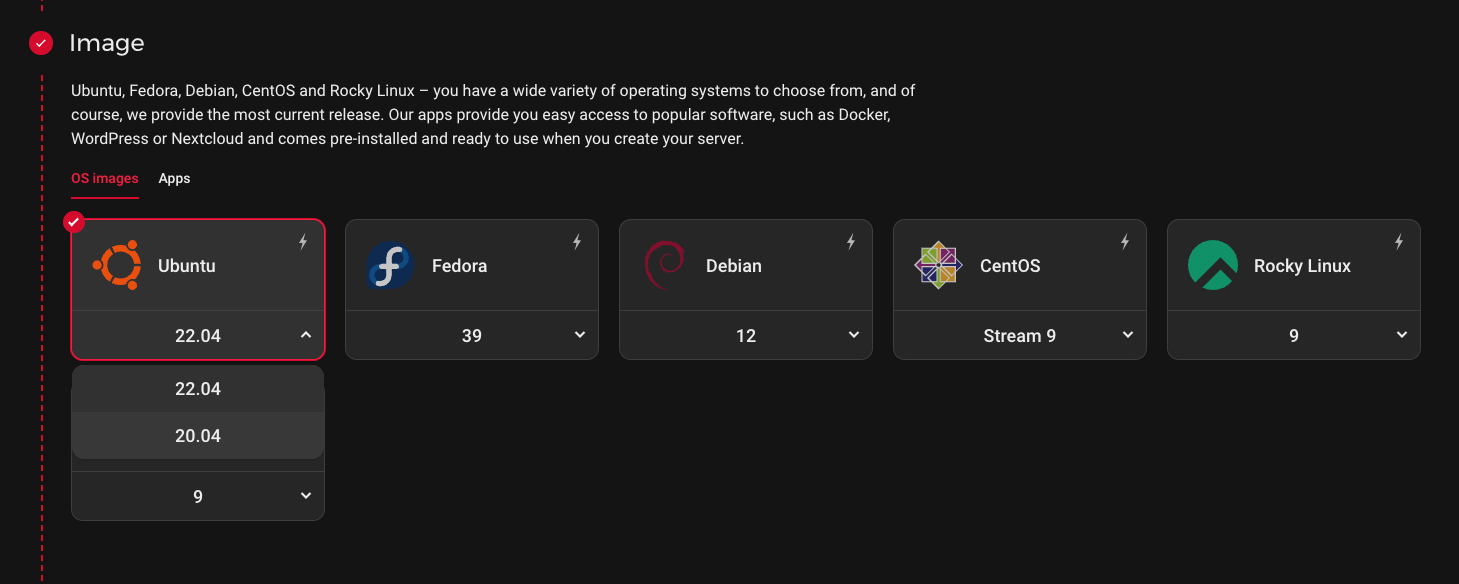
For this guide, we've selected Ashburn, VA which is US east. Next up, we have to select the operating system and version we want Hetzner to install on the server on creation. For maximum compatibility with ServerAuth features, we've selected Ubuntu 22.04.
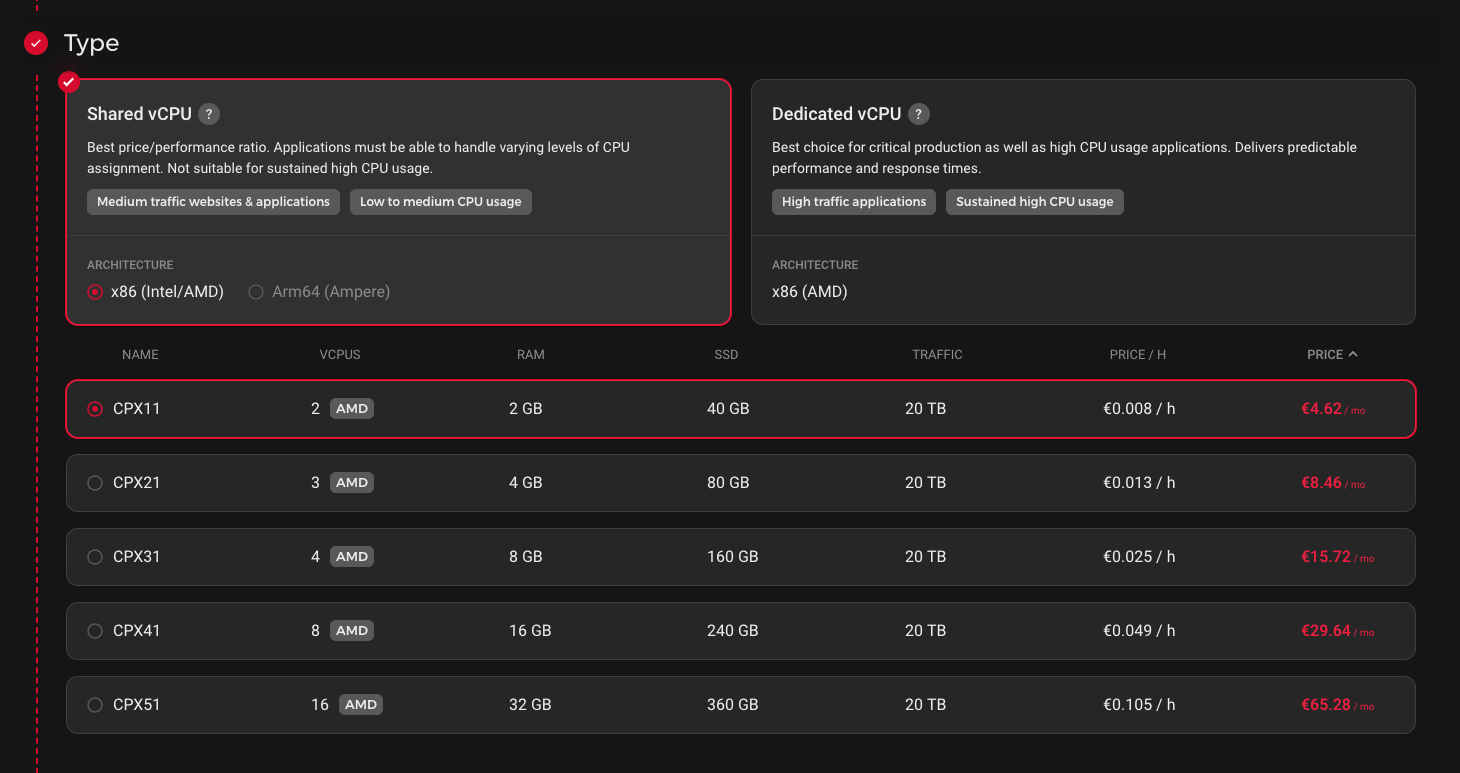
You will then be asked to select the CPU type for your server. For the purposes of this guide, we've opted for a shared CPU and selected the CPX11 which gives us 2vCPUs, 2GB RAM and 20TB of traffic.
In the next section you can customize some basic networking settings. As standard all Hetzner instances include a free IPv6 addresses, however you'll likely want to select an IPv4 address. To use these you'll be charged an extra fee of €0.00096/hour, or approx €0.70/month (prices correct at the time of publication).
The next option is to set up SSH keys for your root user. Grab your SSH key from your computer, if you're on Mac or Linux you can run the following command.
cat ~/.ssh/id_rsa.pub
This should output your SSH key into termainal for you to copy and paste. If you haven't yet got a SSH key on your computer, you can follow the first part of our guide, How to Set up SSH Keys.
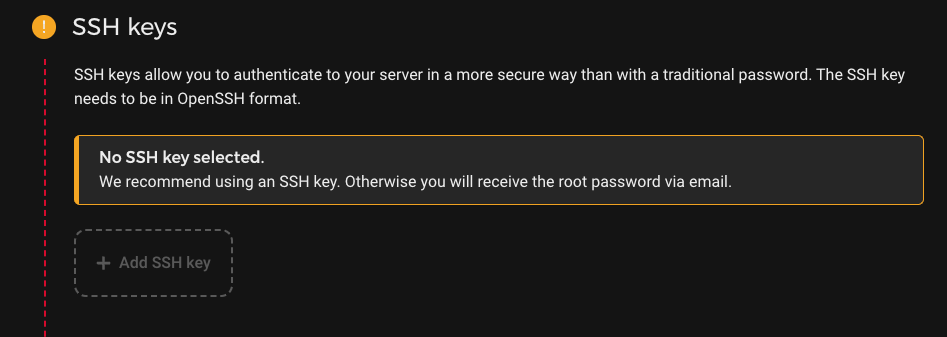
Once, you have your SSH key copied to clipboard, click the add SSH key button and paste your key into the modal window that appears.
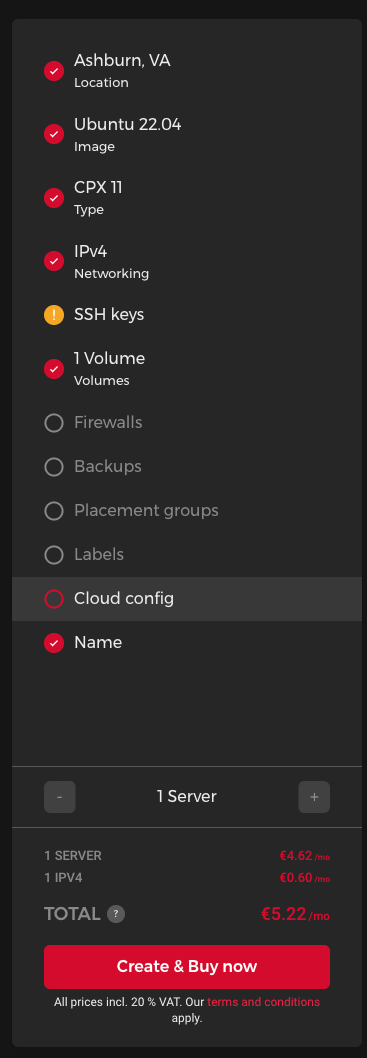
For this guide, we are skipping the rest of the config. Depending on your use case you may need to add more hard drives to the server via the Volumes section or enable backups.
Note We'd recommend not using the firewall within Hetzner control panel if you wish to use the Firewall management within ServerAuth.
Lastly, Hetzner will generate a name for your server based upon some of the options selected however, you can amend this and give your server a more recognisable name so you know what the purpose of the server is. On the right of the screen, you should also see something similar to this depending on what options you have selected.
Once you're happy, click Create & Buy now. Hetzner will start creating your server and you will be redirected to the server listing page.

You can hover over the icon next to the server name to find out the status. When it's green like this screenshot, it should mean your server is up and running. Click the IP address to copy it to your clipboard ready for ServerAuth integration.
When you first login or create your account with ServerAuth, you will be presented with a screen like this.
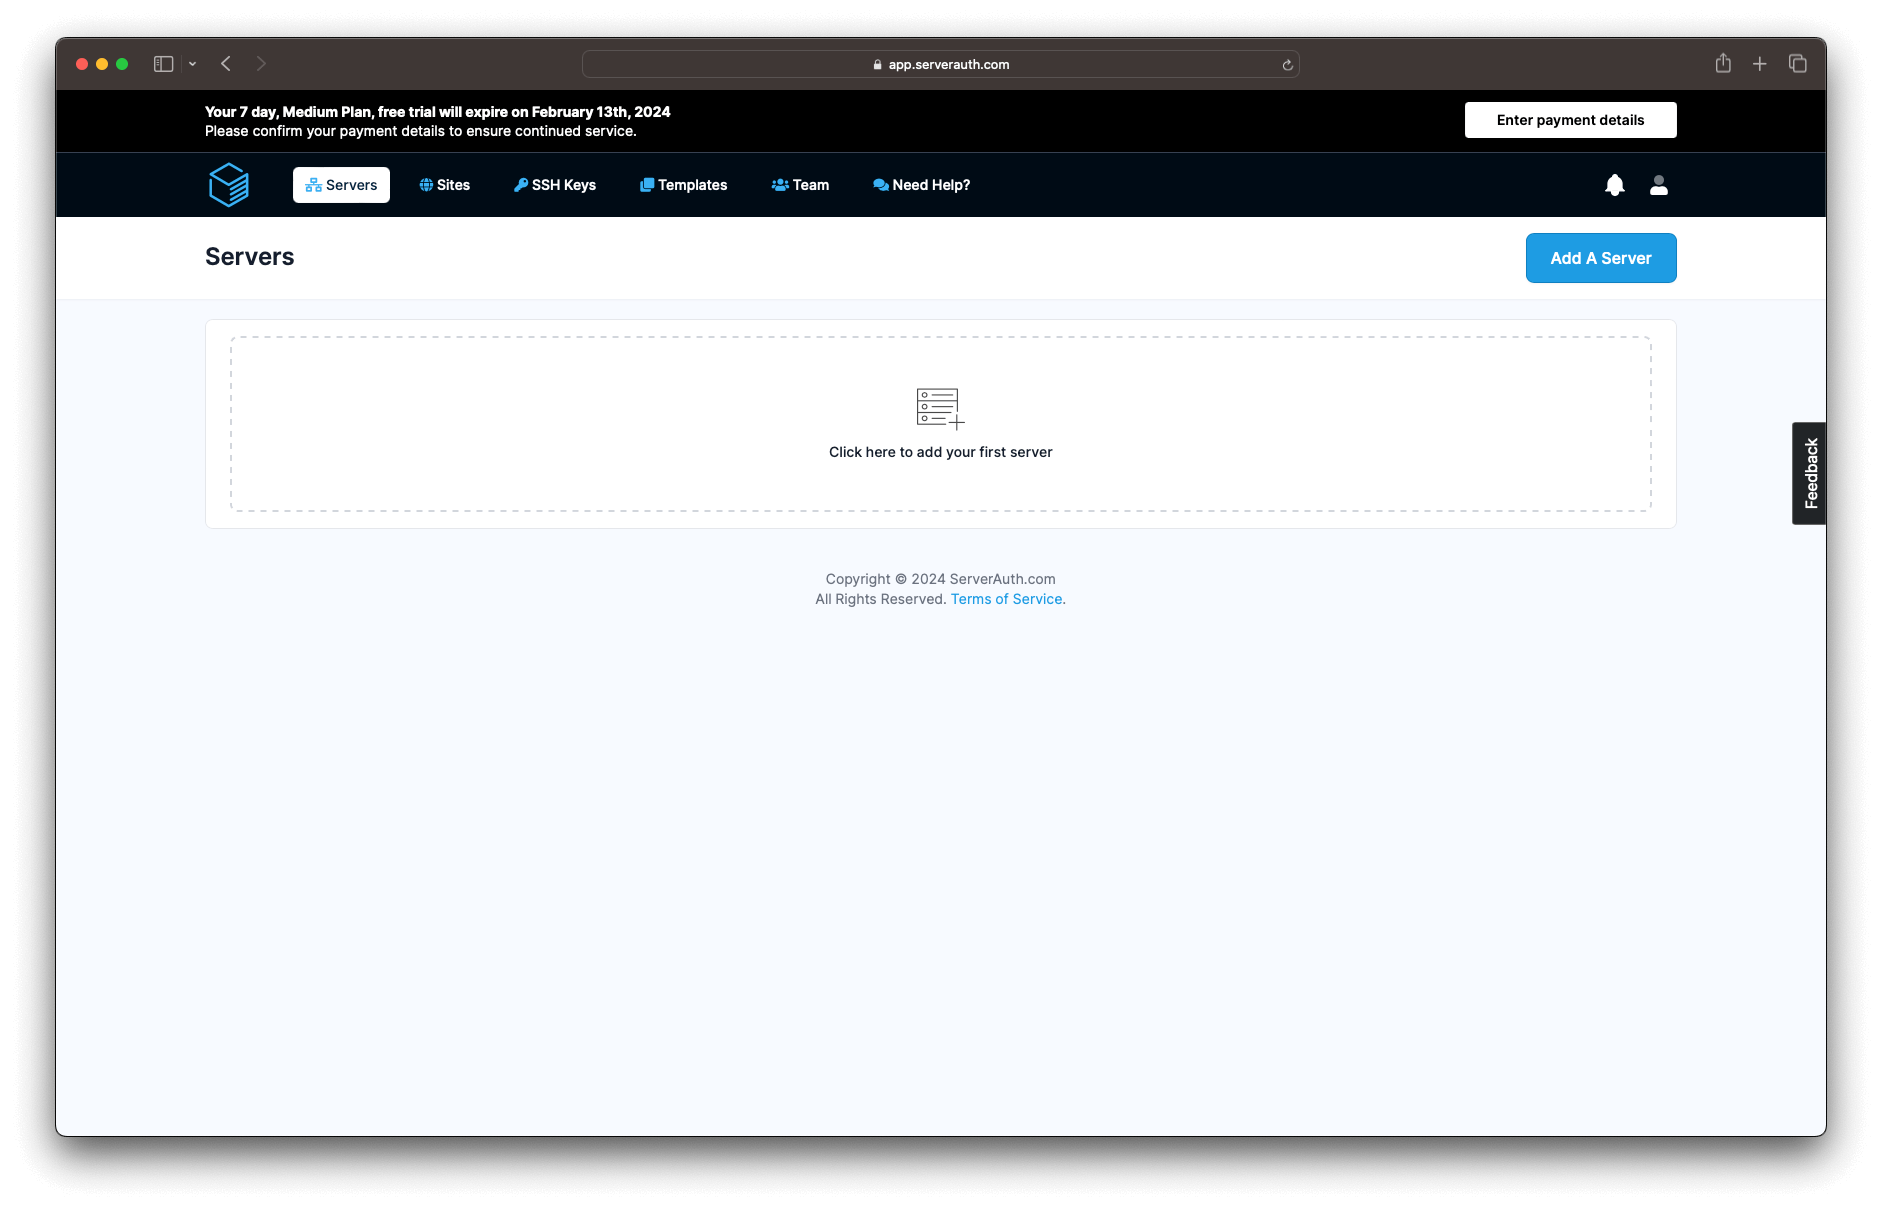
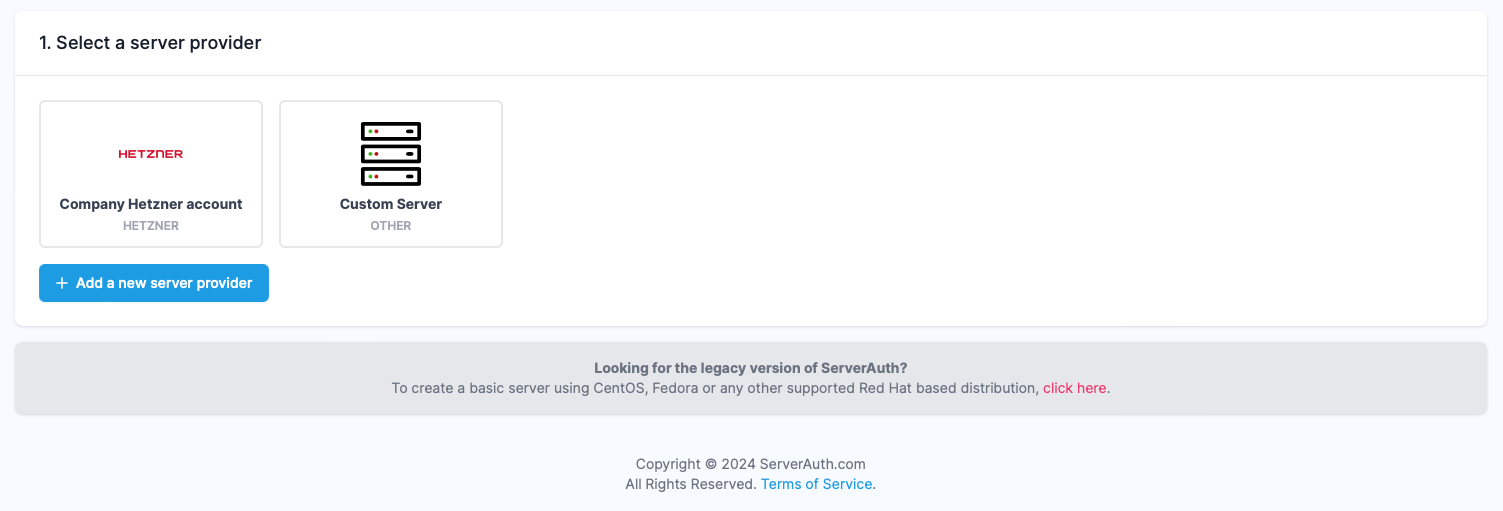
Click the "Add a Server" button to get started with integration to ServerAuth. You'll be presented with an option to select a server provider.
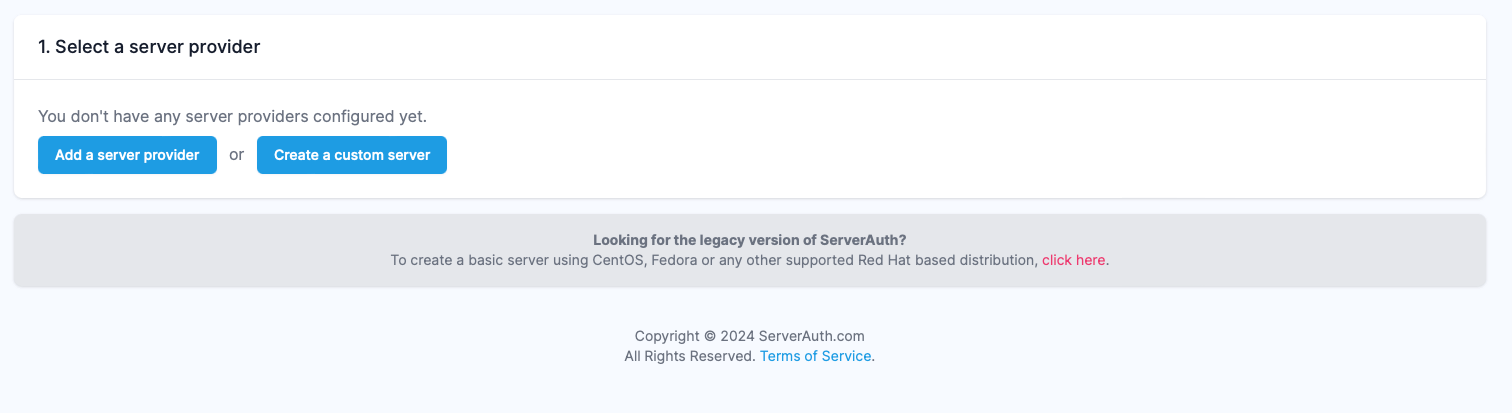
Select the "Create custom server" option, this will take you into the 3 step process for integrating ServerAuth into your server.
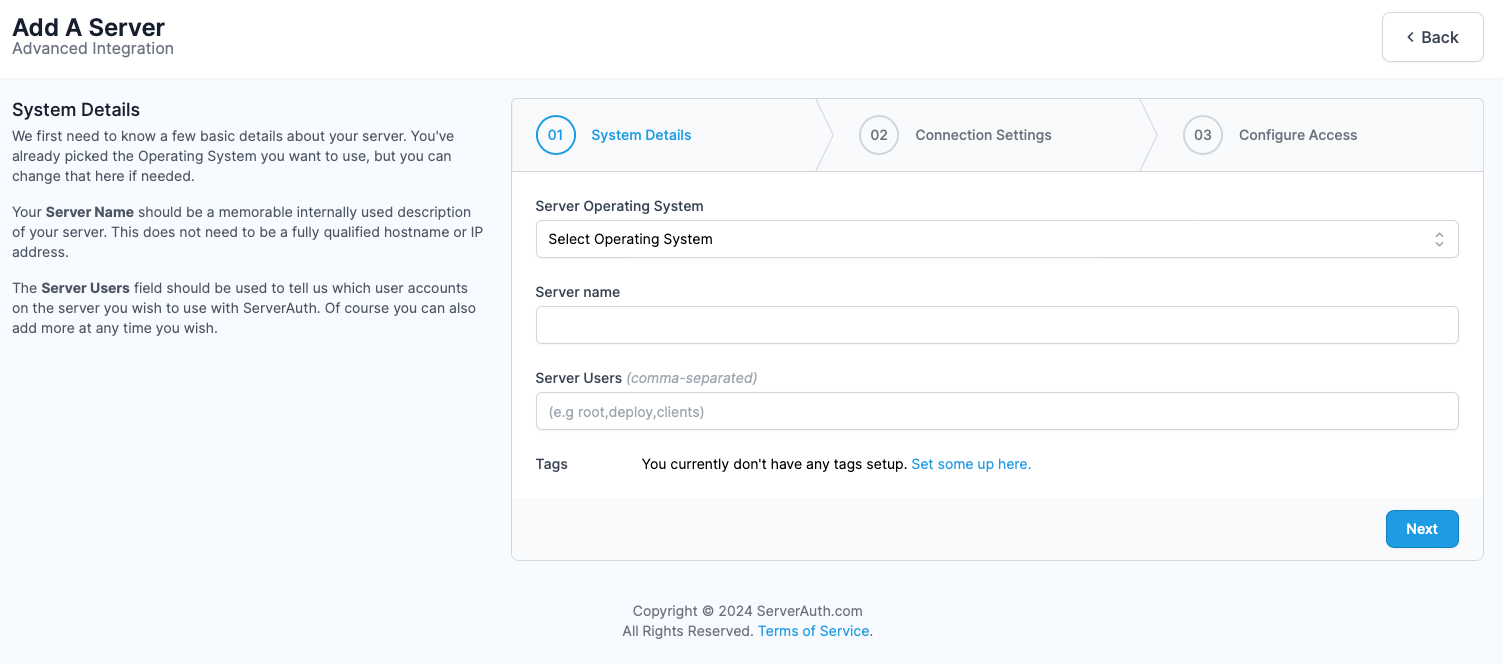
Step 1 asks you to select the operating system of your server, we selected Ubuntu 22.04 during server creation so select that again here. Then enter a recognisable name for your server so you can identify it within ServerAuth. For the purpose of this guide, you can leave Server Users blank and also ignore tags. Click next, when you're done.
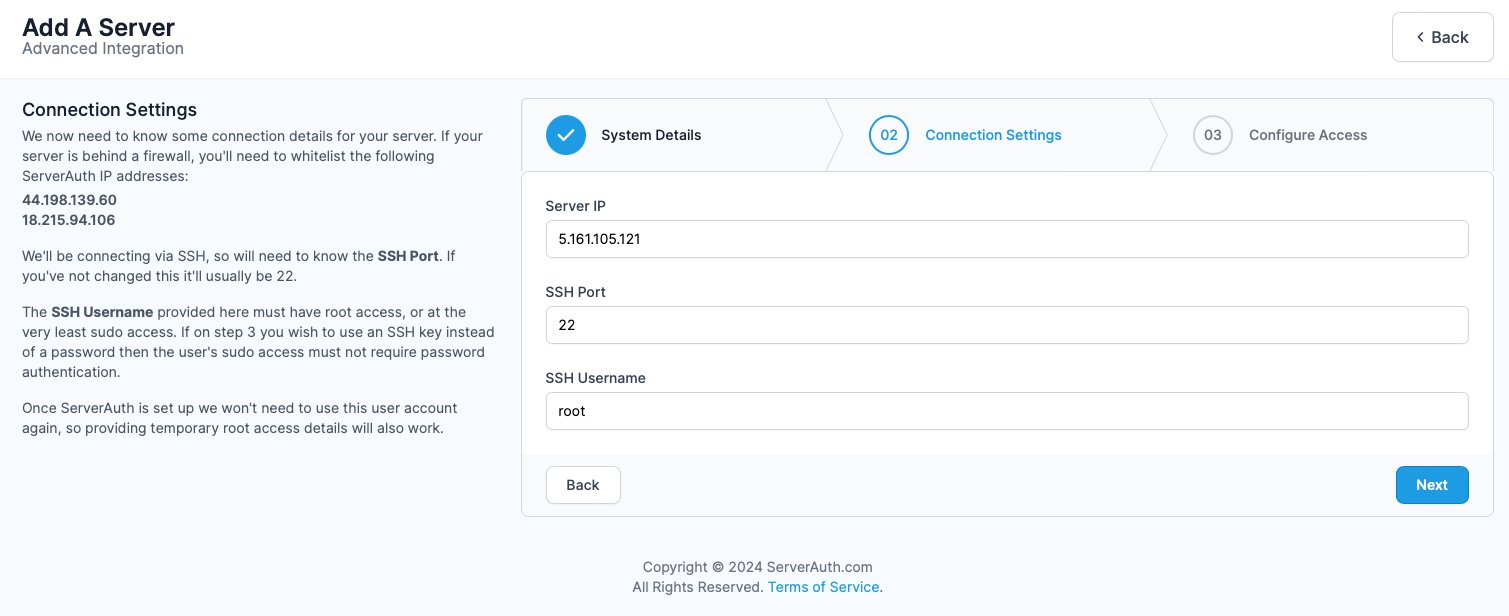
Step 2 asks you for some more information regarding the server. Grab the server IP from Hetzner if you don't already have it saved to your clipboard, and then paste it into the Server IP box.
You can leave SSH Port as 22. For the SSH Username, enter "root" and click next.
Step 3 is where we start to connect to your server. When creating the server in Hetzner, we added our SSH Key rather than use a password, this is always the preferred option over using SSH passwords.
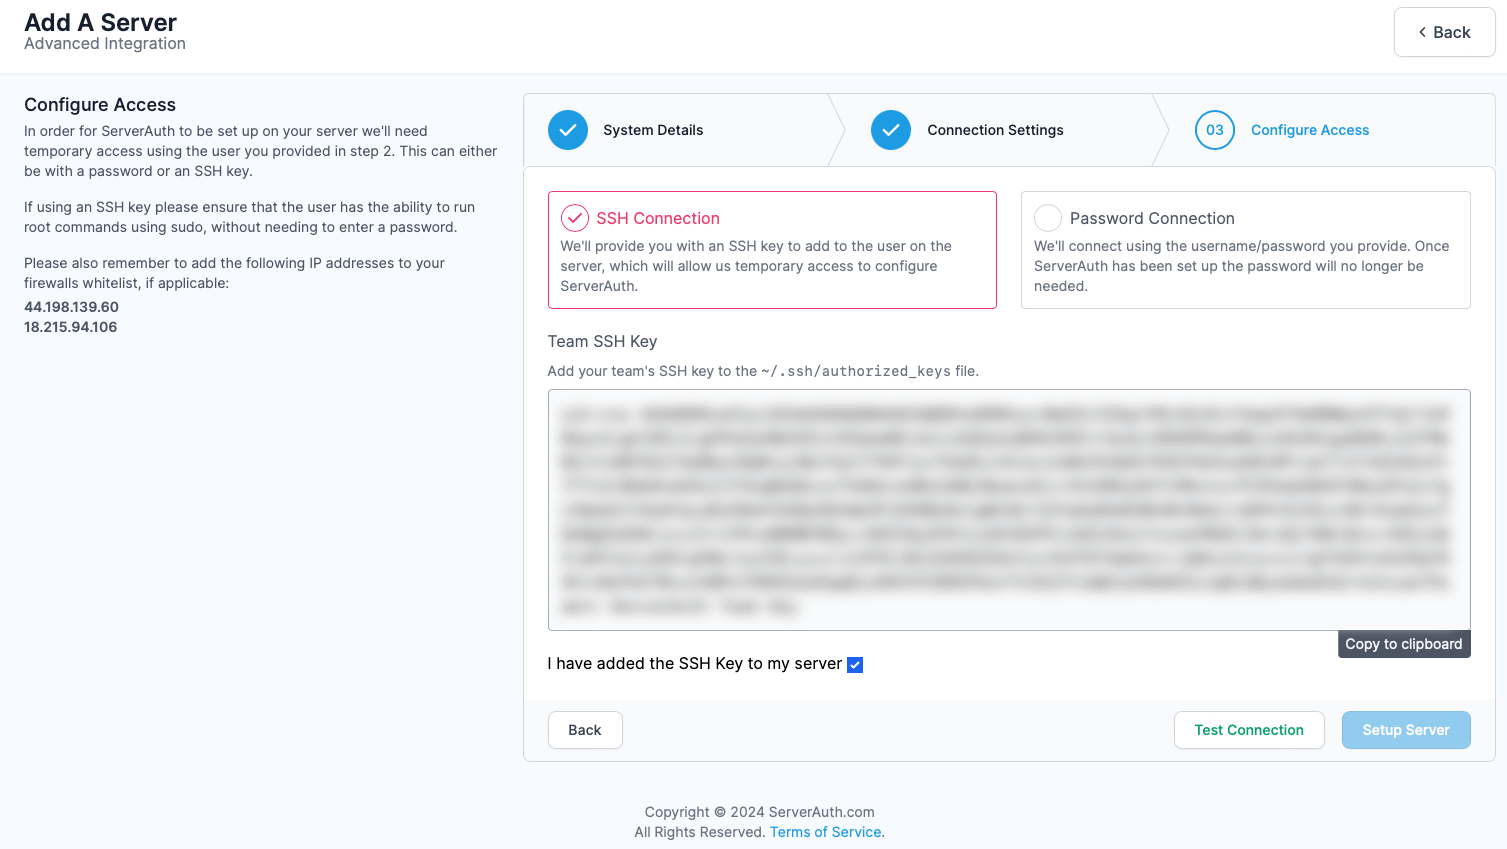
Select "SSH Connection" option and you will be presented with your ServerAuth teams SSH key. This is used by our system to authenticate with your server so we can configure it. Copy your teams SSH key and open up your terminal.
SSH into your root user on your newly created server with the following command, remember to switch out the IP address for your IP.
ssh root@[your-server-ip]
Once you are connected, open up the authorized_keys file for your root user, this can be found at ~/.ssh/authorized_keys.
For this guide, I'm using nano to edit the file but use whatever editor you are most comfortable with.
nano ~/.ssh/authorized_keys
You will see a SSH key already in the file from Hetzner setup. Move the cursor to a new line and paste in your ServerAuth team SSH key, and save the file.
Head back to your ServerAuth window, and check the box to confirm you have added the SSH key to your user and click Test Connection. The button will change to show it is currently testing the connection to your server and once complete, the options should change at the bottom allowing you to setup the server.

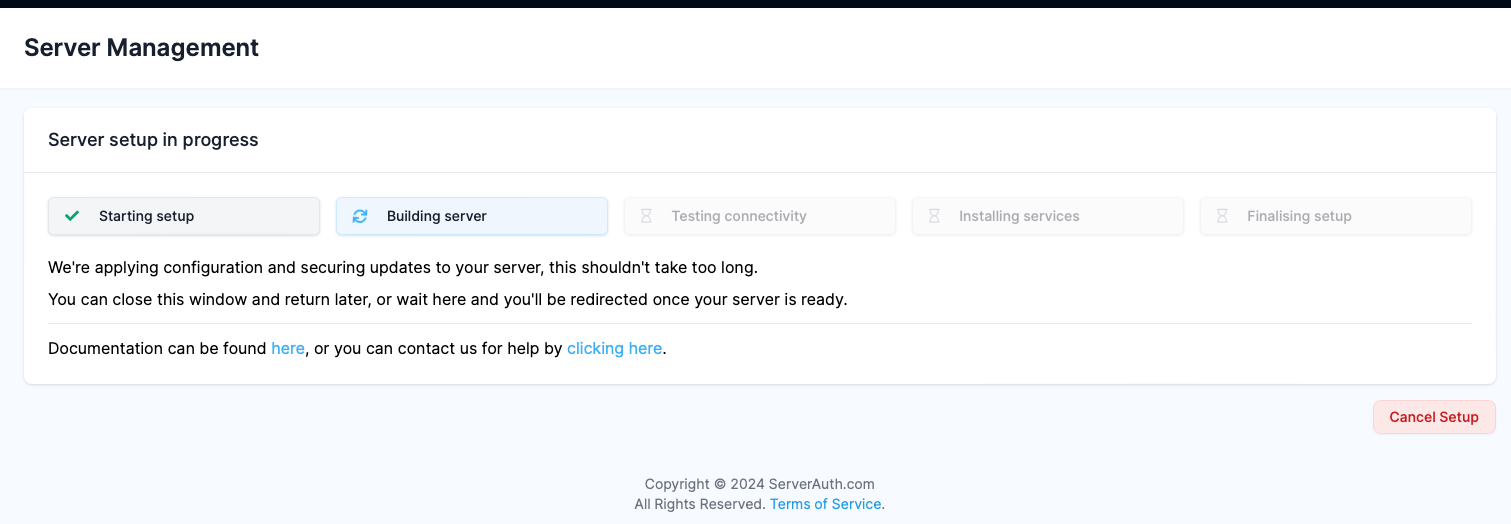
Click the Setup Server button to start the setup process. You will be redirected to a processing screen, showing you the steps to setup your server and highlighting which step the process is currently on.
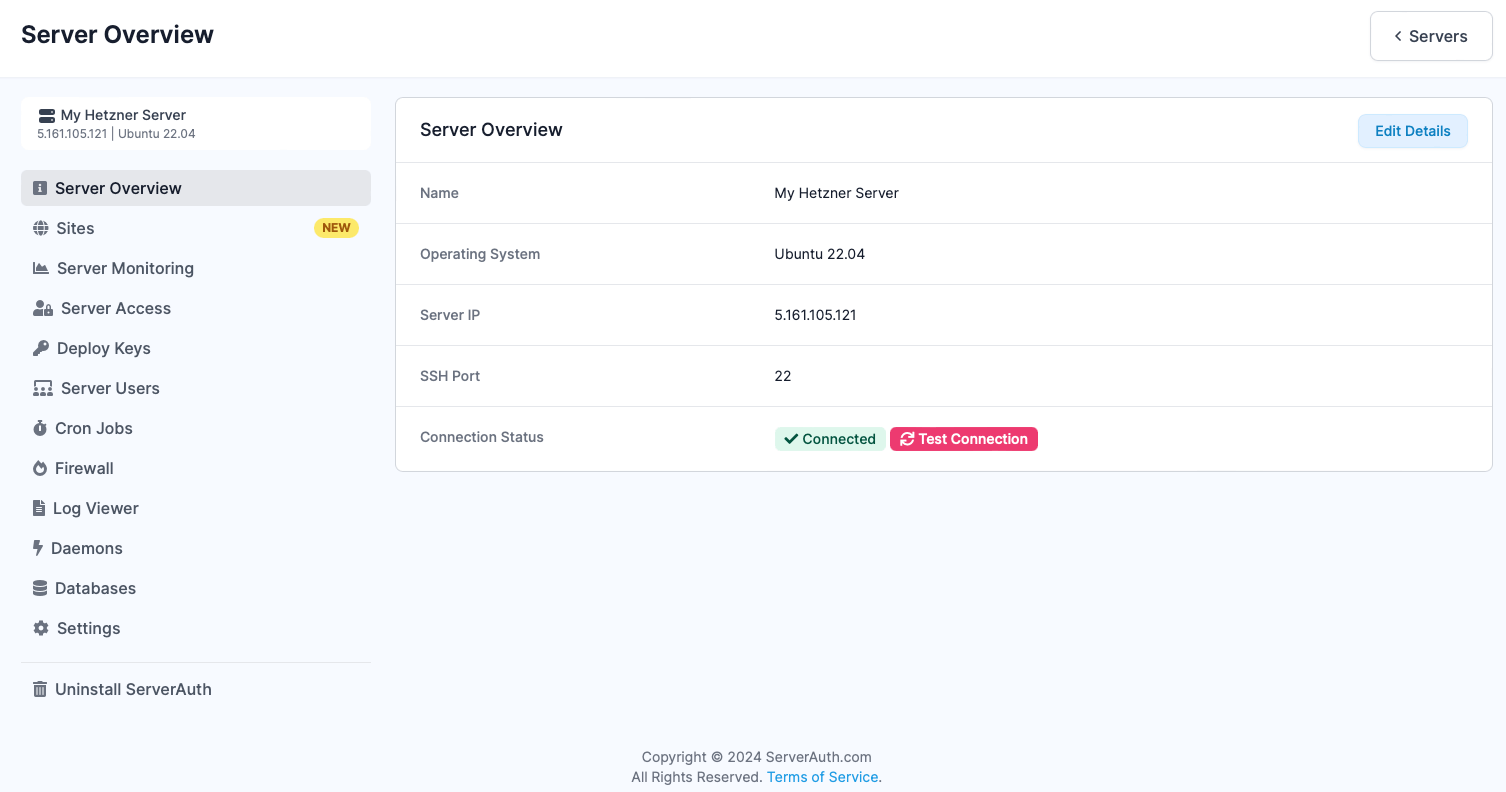
Once setup is successfully completed, you will be redirected the server details screen! Setup is now all complete and you can begin to use ServerAuth to manage your server.
There is also an easier, alternative way to setup your server with Hetzner and integrate it into ServerAuth!
First head to your Hetzner account and click into a project. Hover over the left menu and click into "Security" at the bottom of the menu.
The first screen will show you any SSH keys you have saved. Next click the sub menu to load the API Tokens page.
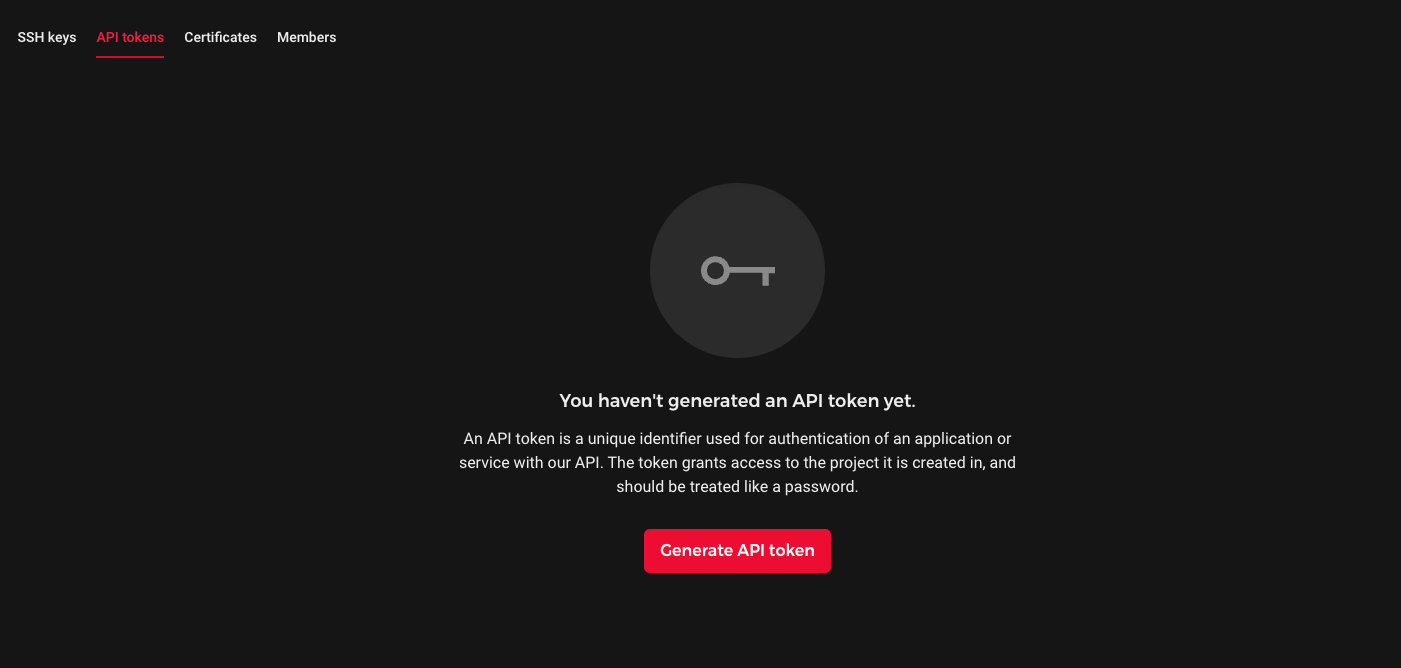
Click the button to generate an API token. A modal will appear, give the API token name so you know what it's used for and grant it read and write access, then click Generate API Tokens.

Click to show your API token and make sure you copy it. Head back to ServerAuth and in the top menu, click the Team link and then the "Server Providers" link in the side menu. You will be presented with a box to create a new server provider.
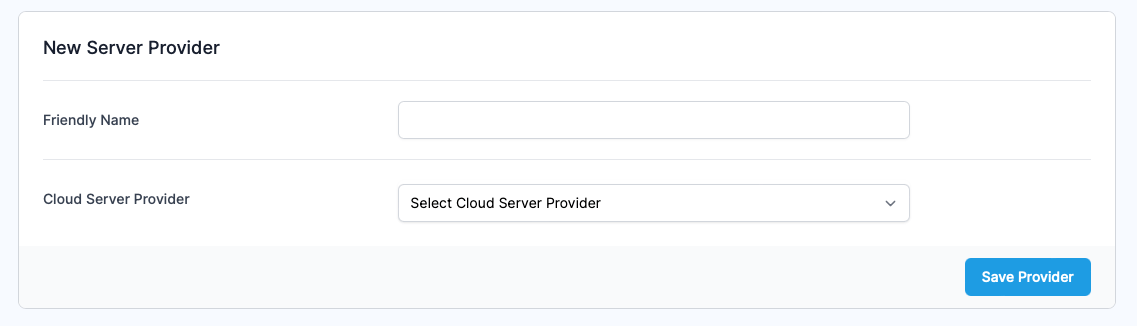
Give the provider a name, if you have multiple Hetzner accounts this could be the name or email on the Hetzner account or some other identifier. Select Hetzner from the provider dropdown. A box will appear to add your API Token. Paste it in then hit save.
Click the Servers link in the top menu and click to Add a Server. You will notice that this page looks slightly different from before as you will now have Hetzner as a server provider option.
Click the Hetzner provider and you will be taken to a new page to enter a recognisable name for your server and then to select which region you wish to create your server in. These will match the options available in the first step when creating the server within Hetzners control panel.
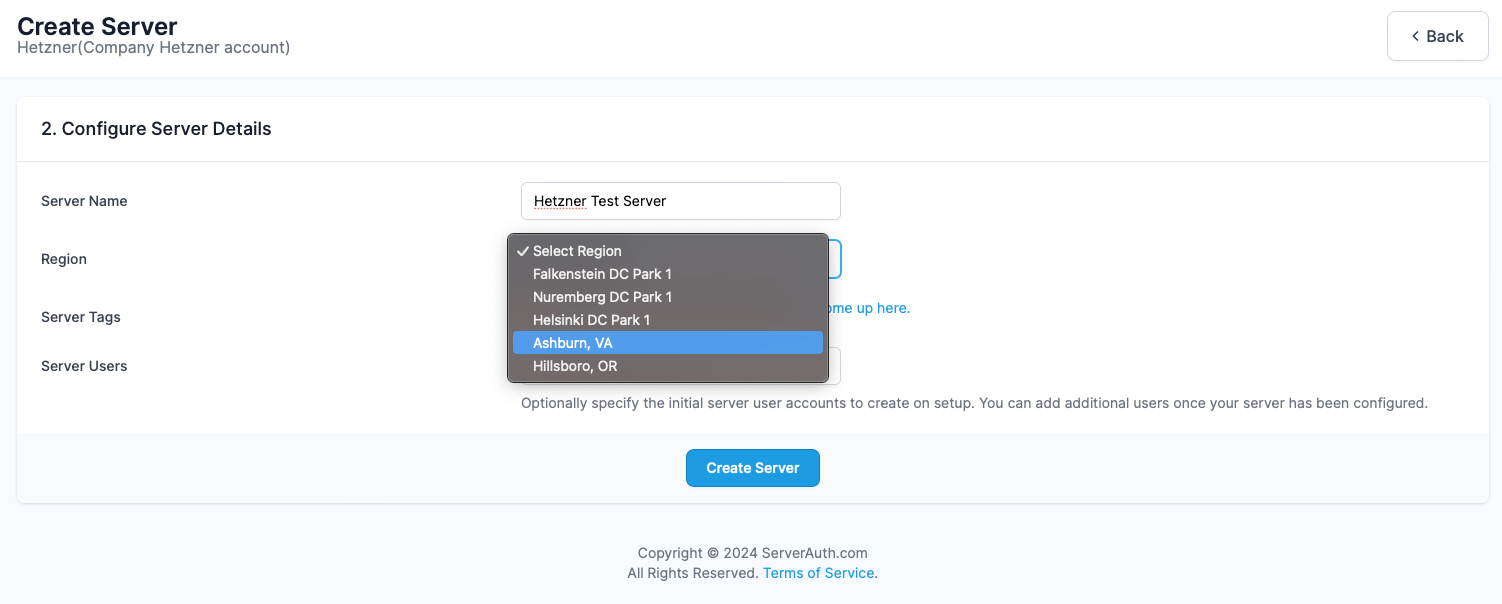
Once you select your region, there will be a short delay as we use your API token to retrieve the available server types and prices from Hetzners API.

You can change the region and the list of available server types will update to reflect availability and pricing. For this guide, we selected to create another CPX11 server. You can also ignore the remaining options. Click Create Server to start the process!
You will be presented with a similar processing screen as before, however wording will be slightly different to reflect the different processes now occuring.
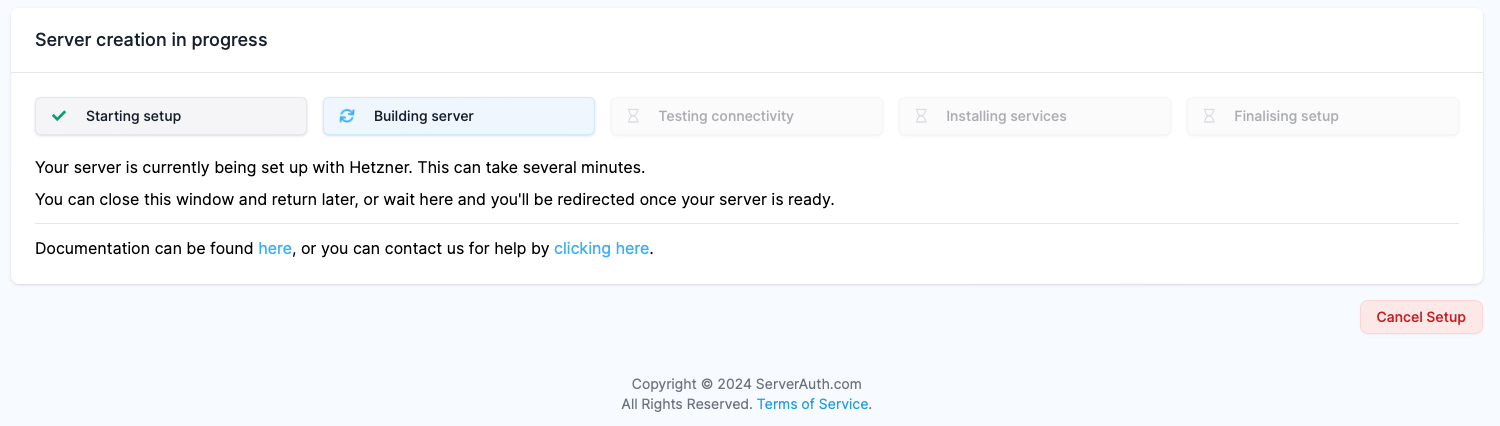
In the background, our systems are now creating the server in your Hetzner account via the API and your API token. Once the server has been created, our server management setup will begin and our system will start to configure everything it needs to manage your server.
Once complete, you will be redirected to the familiar server details page.
Whichever method of integration you chose, setup is now complete! You can use the left menu to access the various options available and start managing your server like a pro!
Check out our help site for more information or assistance on using parts of the system. Alternatively, if you can't find the answer you're looking for, within the ServerAuth platform, you should see the "Need Help?" link in the header. Use this to get in touch with us and we'll do our best to answer any questions you have!
ServerAuth provides a whole host of management tools, from controlling who can access your server, to managing your website deployments. And with an ever-growing suite of tools you'll always be one step ahead!
Start for free
